
Turn the machine on 20‑30 minutes early, lock the portafilter, run a blank shot, then purge the steam wand until dry steam appears. Fill a chilled metal pitcher with cold milk (about one‑third full) and place the wand tip ½‑1 cm below the surface, aiming toward the center. Open the valve fully for 5‑8 seconds to introduce air, then lower the wand to create a tight whirlpool, stopping when the milk reaches 55‑60 °C. Tap and swirl the pitcher to crush large bubbles, purge and wipe the wand, and you’ll get silky micro‑foam—keep going for more detailed tips.
How to Warm Up the Espresso Machine and Purge the Wand
Because the boiler alone isn’t enough, you must let the whole machine—group head, portafilter, and wand—heat evenly before you steam. Turn the machine on **20–30 minutes early with a smart plug, lock the portafilter in the group head, and run a blank shot to speed saturation. Flush the group head with hot water, then cover the machine to retain heat. When the temperature stabilizes, perform a steam wand purge: open the wand for 1–2 seconds until dry steam appears, clearing condensation and stale water. This brief pressure dip triggers the heater to recover, delivering a consistent, powerful steam flow. After steaming, wipe the wand, then give a second short purge to expel milk residue and protect performance. Regularly perform a deep clean of the brew group to maintain optimal temperature stability. Incorporate a monthly descaling routine to prevent mineral buildup that can affect steam efficiency. Proper group head flushing** removes coffee oil residue that can degrade flavor.
How to Choose the Right Cold Milk and Fill the Pitcher
When you’re ready to steam, start with milk that’s still straight from the fridge—ideally 34‑41 °F (1‑5 °C)—and choose a type that suits your texture goals, such as whole dairy for rich microfoam or a barista‑grade oat/almond alternative. Keep the milk temperature low to extend the steaming window and avoid premature curdling. Select a clean, chilled pitcher; metal works best because it retains cold and conducts heat evenly. Rinse the pitcher with cold water before filling to guarantee the surface stays frosty. Fill the pitcher to one‑third or one‑half full, leaving room for expansion. Match the volume to your drink size: less milk for lattes, a bit more for cappuccinos, but never exceed the midpoint to preserve control and foam quality. Use the precision pore spout to pour smoothly and achieve better latte art. Understanding the protein structure of almond milk helps explain why barista‑grade versions foam more consistently.

So creamy! So plant-based!

FROTH + STEAM PERFECT LATTES: With Oat Barista Blend you can froth and steam perfect dairy-free lattes at home. Naturally creamy and subtly sweet, Oat Barista Blend is made for lattes.

BARISTA GRADE FROTH & STEAM: Experience the magic of frothing and steaming like a pro barista. Our organic oatmilk delivers exceptional performance, creating silky-smooth microfoam for your favorite coffee creations.
How to Position the Wand Just Below the Milk Surface for a Whirlwind
If you dip the wand tip just beneath the milk surface—about 0.5–1 cm deep—you’ll hear a gentle ripping sound that signals the perfect aeration zone. Immediately aim the wand toward the pitcher’s center, keeping a slight tilt that encourages surface‑level positioning and stable whirlpool dynamics. This pitch‑angle control creates a tight vortex, pulling air into the milk while preventing large bubbles. Observe the foam placement: a thin, glossy layer forms as the whirlpool rolls continuously without separating. Adjust the wand a fraction of a centimeter if the sound fades or splashing occurs; too deep mutes the rip, too high creates chaotic bubbles. Maintain this balance for the first few seconds before lowering the wand for heating. Lower pressure machines require smaller milk volumes and a quicker steam‑on/off cycle to achieve the same vortex effect. Proper air injection ensures a creamy, velvety foam. Using whole dairy milk maximizes richness and stability of the foam. The micro‑foam texture is essential for achieving latte art..

Perfect Combination Of Milk Frothing Pitcher And Latte Art Pen: The milk frother jug can be used in different ways: froth or steam milk for lattes; measure liquids; serve milk or cream. Featured with a latte art pen which can shape kinds of beautiful coffee pattern. Perfect for making frothing or steaming milk for espresso, cappuccino or hot chocolate. Be your own barista in home and office.

304 STAINLESS STEEL: Amrules 12oz creamer pitcher are crafted of 18/8 food grade stainless steel. The pitcher features external mirror finish and internal hairline finish. It is sturdy, durability, rust-resistant and resistant to deformation

Make Your Favorite Espresso Coffee At Home: The CASABREWS coffee machine with milk frother allows you to prepare all your favorite espresso-based coffees. You can enjoy a barista-brewed latte, cappuccino or macchiato at home. Stainless steel appearance, stylish and durable, ideal for any size kitchen. This compact espresso coffee maker is perfect for home or office use
How to Introduce Air During the Stretching Phase (5‑8 seconds)
Keeping the wand just under the surface sets the stage for the stretching phase, where you now focus on pulling air into the cold milk. Begin by turning the steam valve fully; a steady hiss signals that full flow is entering the pitcher. Maintain the wand at a shallow angle so the tip skims the milk, creating a gentle vortex. As the hissing begins, watch the volume rise—aim for a 20‑30 % foam ratio for latte or 30‑40 % for cappuccino. Keep the sound consistent, using flicker control to avoid sudden bursts that spawn large bubbles. After 5‑8 seconds, the hiss should soften, indicating you’ve reached the desired foam level and are ready to move on to texturizing. For best results, use cold whole milk to achieve a richer, more stable foam. Selecting the right milk type is crucial for consistent micro‑foam, as whole milk’s fat content helps create a smoother texture. The high‑pressure pump in a Nespresso machine can reach up to 19 bar, which is similar to the pressure needed for optimal espresso extraction.

【Food Grade Material】This milk frothing pitcher is made of high-quality 304 stainless steel, which is rust proof, stain proof, and heat resistant. It has a stylish appearance and is very easy to clean after use.

【Food Grade Material】This milk frothing pitcher is made of high-quality 304 stainless steel, which is rust proof, stain proof, and heat resistant. It has a stylish appearance and is very easy to clean after use.

TOP QUALITY - The frother pitcher is made of #304 stainless steel with non-stick teflon coating, ust-proof, stain-proof and crash-proof, unbreakable for daily use. Dishwasher-safe & easy to clean with soapy water.
How to Submerge the Wand Deeper to Smooth the Milk Texture
After the foam has built up, lower the wand just below the surface and let it sink a few centimeters to create a steady whirlpool. You’ll notice the steam energy shift from surface aeration into liquid circulation, turning large bubbles into fine microfoam. Keep the wand tip moving slowly deeper in small increments; a sudden plunge kills the vortex and flattens the foam foam. Tilt the pitcher slightly and position the wand to the side so the whirlpool folds the foam back into the milk, producing a glossy, unified texture. Watch for a steady hissing sound and a visible spin—these signs confirm proper depth. If the milk turns thin or the hissing fades, you’ve gone too deep. Adjust gradually until you achieve smooth texture consistency. This technique also helps expose channeling issues early, allowing you to correct grind size or tamp pressure for a more even extraction. Using a shaken jar method can give a quick preview of the foam’s stability before you start. Proper water temperature is crucial for consistent milk steaming results.
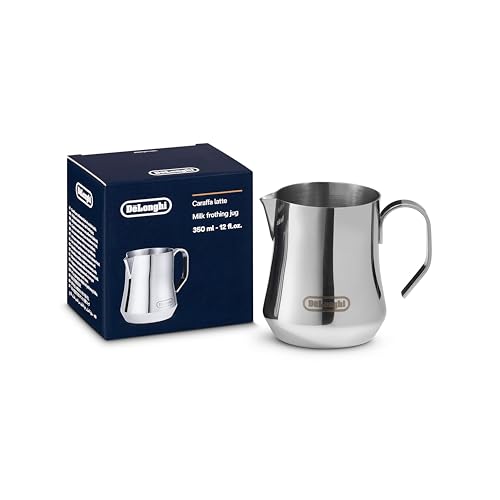
Stainless Steel Milk Frothing Jug

Heavy-duty 304 Stainless Steel: Our silver steaming pitcher is made of food-grade 304 steel-rust-proof, heat-resistant, and incredibly easy to clean; No scrubbing caked-on milk; Built for daily use and fully dishwasher safe for zero-hassle cleanup

High-Quality Material: Made of 18/8 stainless steel, this milk frothing pitcher is rust-free, easy to clean, and dishwasher safe. The well-polished surface and clear internal measuring scales help you accurately measure the amount of liquid.
How to Watch the Temperature and Stop Before It Overheats (55‑60 °C)
Now that the whirlpool is steady and the foam has turned into silky microfoam, shift your focus to temperature. Use a calibrated thermometer to watch the milk climb toward 55‑60 °C. If you prefer hand‑hold cues, pause steam when the pitcher feels too hot to hold comfortably—usually around 55 °C. Light taps on the side confirm the rise without a constant grip. Remember that milk continues heating after you shut off the wand; stop a few degrees below the final target to let coasting bring it into the low 60s. This prevents protein denaturation near 70 °C and avoids the burnt taste that appears past 72 °C. Consistent thermometer calibration and reliable hand‑hold cues keep your microfoam sweet and silky. Adjust the timing based on the machine’s steam pressure, using the hand‑hold cue to gauge when the milk is near 65 °C. Regularly descale the espresso machine as described in the De’Longhi Espresso Machine Care guide to maintain optimal steam performance.
How to Tap and Swirl the Pitcher to Eliminate Large Bubbles and Polish the Foam
By tapping the pitcher lightly against the counter and then swirling it in a steady circular motion, you collapse the large surface bubbles and blend the foam evenly throughout the milk. After the wand shuts off, give one or two gentle taps; avoid hard bangs that could re‑agitate the milk. Immediately follow with a smooth vortex, pressing the milk against the pitcher walls. A stronger swirl spreads the foam, refining the foam‑foam ratio and eliminating stray bubbles. Keep the motion steady until just before you pour, preserving texture consistency and a velvety sheen. If you still see large bubbles, repeat a light tap‑and‑swirl cycle, but stop before the foam sets. This finishing step polishes the milk without compromising the microfoam structure. For optimal performance, regularly clean the machine’s water reservoir to prevent mineral buildup. You can also achieve comparable microfoam using a French press by pumping the plunger rapidly after heating the milk. Consistent tamping pressure ensures the espresso extraction is uniform, which directly influences the milk’s texture.
How to Purge and Wipe the Wand Immediately After Steaming
If you finish steaming, open the steam valve immediately to purge the wand with a short burst of steam, then wipe the exterior with a damp towel while the wand is still warm. A two‑second burst clears milk from the tip and tube, preventing residue from re‑entering when pressure drops. Direct the wand over the drip tray during the purge to capture expelled milk. Immediately after, use a damp cloth or cellulose sponge; the warm surface releases milk film before it dries, ensuring steam wand hygiene and effective residue prevention. A dry towel would smear the film and set it. If you notice lingering droplets, a quick cold‑water dip followed by another short purge removes stubborn deposits. Repeat this routine after every steaming session. Regular maintenance helps prolong the wand’s performance and prevents buildup that could affect steam pressure. Using a low‑heat setting can reduce the risk of scorching the milk, which aligns with the principle that porous materials like paper towels can affect flavor when used improperly. Descaling the machine every 2–3 months removes mineral buildup that can also affect steam wand efficiency.
How to Troubleshoot Common Steaming Issues and Fixes
When you encounter thin milk, rattling bubbles, or burnt flavor, start by checking wand depth, pitcher angle, and temperature—each factor directly influences aeration, vortex formation, and scalding, and adjusting them promptly resolves most steaming problems. If the wand sits too deep, air can’t enter, so raise it just under the surface and lower it after aeration begins. For rough bubbles, keep the tip higher longer, then dip it to create a tight whirlpool; tilt the pitcher to enhance circulation. Monitor temperature, aiming for 130‑150 °F, and stop before 165 °F to preserve milk consistency and foam stability. Adjust steam flow by partially opening the valve if it’s too aggressive, and use the same pitcher size and volume each time for repeatable results.

【Premium Food-Grade 304 Stainless Steel】Milk frother cup is made of premium food-grade 304 stainless steel, this non-toxic, odorless coffee pitcher ensures safe daily food contact. It delivers outstanding rustproof, stain-resistant and heat-resistant performance for durable use. Adopting seamless welding technology, the integrated body and handle feature solid structure.
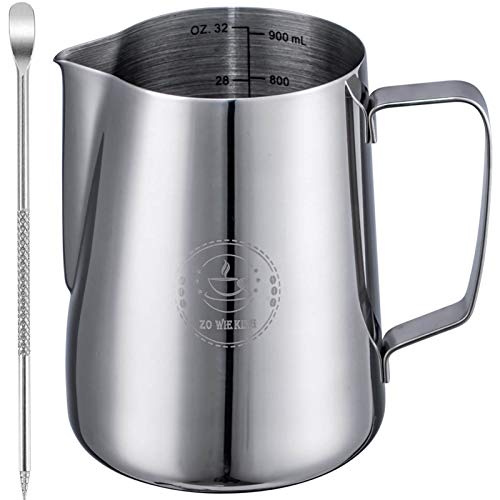
☕【Fashion & Durable】 The milk frothing pitcher is made of high quality 304 stainless steel, strong and durable, exquisite workmanship.non-rust,anti-corrosion,unbreakable for daily use. Very easy to clean after use.

Women's A-Line High Waist Fall Midi Skirt