
Turn off and unplug the machine, then hold the shutdown button for three seconds (or press the brew lever similarly) until the indicator lights stay solid. Open the head lever fully, pull out the drip tray, and slide the used‑capsule container out, emptying it into the waste bin. Run the built‑in emptying cycle by holding the top button while plugging it back in (or press espresso + lungo together for three seconds on compatible models). Rinse the drip tray, cup support, and water tank with warm soapy water, dry them, and re‑assemble everything securely. Finally, brew a quick water‑only cycle to confirm everything’s clear—keep going for deeper maintenance tips.
Power Off and Unplug Your Nespresso Machine Safely
A few quick steps will let you power off and unplug your Nespresso machine safely. First, press the correct shutdown sequence for your model: hold the button 3 seconds on Vertuo Next, lower the head and press the lever 3 seconds on Vertuo Plus, hold the button 3 seconds on VertuoLine Evoluo, or press both brew buttons together on CitiZ/Essenza‑style machines. Wait until solid indicator lights appear, confirming the machine is idle and not in a warm‑up state. If your model offers automatic shutoff, let it engage after 2–9 minutes of non‑use; this supports energy saving and reduces standby mode draw. Once the lights are steady, unplug the cord at the wall outlet—never pull the plug while the surface is wet. If the machine stays on, hold the Lungo button 5 seconds for a reset, then unplug for five minutes to clear any stuck electronics. Manual shut‑off provides faster cooling and does not require unplugging. Regular descaling is essential to maintain optimal pressure and prevent mineral buildup that can impair performance. Performing a factory reset can also resolve persistent error codes. A proper reset can help clear error codes that may appear after repeated use.
Open the Machine and Access the Capsule Chamber
When you’ve powered off and unplugged the machine, release the head by moving the lever to its fully open position—on a Vertuo Pop Plus this means sliding the lever right until it clicks, while other models may require a different direction. Pull the lever gently but firmly; the safety lever must travel to its stop to avoid partial release. The lid lifts, exposing the capsule chamber. Perform a quick capsule inspection: guarantee no pod remains seated and that the ejected capsule has dropped into the internal holder or receptacle. If a capsule is still present, repeat the opening motion carefully. Keep the chamber clear, straighten any bent rims, and avoid prying or forcing the lever—smooth motion protects the mechanism and guarantees safe access. Ensure the capsule holder is empty before proceeding. Regular descaling helps maintain optimal water flow and prevents mineral buildup that can affect capsule ejection. Proper water hardness also reduces the frequency of needed cleanings and extends the machine’s lifespan. Follow the recommended cleaning schedule to preserve coffee quality and prevent blockages.
Remove and Empty the Used‑Capsule Container
Because the used‑capsule container sits right under the drip tray (or on the side for Vertuo Pop Plus), you’ll start by pulling the tray outward to expose the basket. Grip the container’s front edge, support it from underneath, and slide it straight out. Keep the container level to avoid spilling loosely stacked capsules. Empty the capsules into a waste bin, then tap the container to release any stray grounds. Rinse the holder with warm water, dry it, and inspect the grated base for residue—essential for capsule recycling and maintaining container ergonomics. Reassemble any removable sections, slide the container back until it clicks, and replace the drip tray. The machine is now ready for the next brew. Simple visual identification ensures you can quickly locate the container without extra tools. Regular descaling with a descaling solution helps prevent mineral buildup that could affect the container’s removal. Proper safety precautions should be observed before any maintenance to avoid electrical hazards. Proper maintenance can extend a machine’s lifespan to seven to ten years.


Capsule container compatible with / replacement part for Krups XN910B XN9105 XN910C Vertuo Next Nespresso

Run the Built‑In Emptying Cycle (If Supported)
Wondering how to clear the machine’s internal water before storage? First, check if your model supports a built‑in emptying cycle. Vertuo machines have a storage cycle; Inissia offers an emptying mode. Remove any capsule, empty the water tank, lock the head, and place a container under the outlet if water will be expelled.
For Vertuo, perform cycle activation by unplugging, then holding the top button while plugging back in; the machine will start the storage cycle and run until it powers off automatically. For Inissia, press the espresso and lungo buttons together for three seconds; the indicators will blink alternately, signaling water drainage, and the machine will shut off when empty.
During the emptying cycle, the machine also clears any residual water from the internal lines. After the cycle ends, leave the head open to let residual moisture evaporate, discard collected water, and confirm the unit is dry before storage. Using lukewarm water for the rinse helps prevent mineral buildup and preserves coffee flavor. Regular descaling maintains optimal performance and extends the lifespan of your espresso machine. Adding a descaling solution after emptying can further protect the pump from scale buildup.

Includes: 2 portioned pouches of descaling solution specially designed for your Nespresso machine

RESTORE COFFEE FLAVOR & AROMA: Our universal descaling solution removes bitter mineral buildup and calcium deposits from heating elements. This ensures your Keurig cleaner process restores the original "day one" taste of your favorite pods and espresso capsules

2-Pack Coffee Descaler and Cleaner - Clean and rinse away residue and oil buildup in your coffee maker with Impresa's Coffee Descaler Solution. Our highly effective solution comes with two 8-ounce bottles - enough for 4 descaling sessions (2 uses per bottle)
Clean the Drip Tray and Cup Support
First, remove the drip tray and cup support from the machine, inspect them for coffee residue, pooled water, or capsule debris, and set them aside for cleaning. Fill a basin with warm, soapy water and submerge both parts. Use a soft sponge for soft tray cleaning, scrubbing gently to lift residue without scratching. Let the tray soak briefly if buildup is stubborn, then rinse thoroughly to eliminate soap film. Pat dry with a microfiber cloth and allow any remaining moisture to air‑dry; this completes cup support drying. Do not reassemble while damp, as standing water encourages slime. Once completely dry, reinstall the tray and support, ensuring they sit flush and clean for the next brew. Avoid strong abrasive cleaners when cleaning to prevent damage to the components. Using a paper towel as a temporary filter can introduce chemical residues that affect flavor. A single‑shot espresso typically fits in a 2 oz demitasse cup, which helps maintain proper extraction balance. For richer micro‑foam, consider a steam wand that can achieve finer texture.
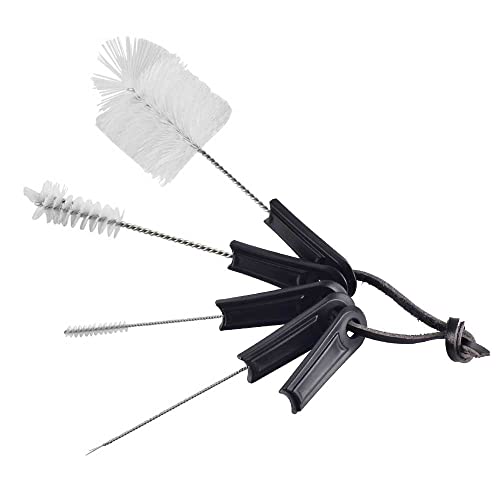
Espresso Brush Pack - Including 5pcs espresso machine cleaning brush tools and 1pc espresso portafilter basket remover tool, for cleaning any space of your espresso machine.

Cleancaf Coffeemaker Cleaner eliminates residual coffee oils and buildup that can turn rancid to prevent bitter tasting coffee

1-Year Supply, Better Value - Includes 24 coffee maker descaling tablets—enough for monthly cleaning for up to a year. A cost-effective alternative to powders, liquids, pods, sachets, or packets.
Rinse and Wash the Water Tank and Its Lid
After you detach the water tank and its lid, empty any remaining water, then rinse both parts under warm running water to remove loose particles before you begin the thorough wash. Perform a lid inspection for cracks or residue, then submerge the tank and lid in a basin of warm, soapy water if coffee film is visible. Use a soft cleaning cloth or gentle sponge, scrubbing edges, seams, and the underside of the lid without scratching the plastic. Rinse repeatedly until all suds disappear. Wipe dry with a soft cloth, then let the components air‑dry fully, ensuring no water remains in corners or under the lid seal. Confirm no detergent residue before refilling. Regular descaling helps prevent mineral buildup and maintains optimal brew quality, so consider performing a descaling cycle every three months. The citric acid in descaling solutions effectively dissolves calcium deposits without damaging the machine’s internal components. The proprietary capsule system ensures each brew maintains consistent flavor and freshness.

Bottle cleaning brushes with multiple usage includes 7.9-12.5 inches straw tube cleaning lab brushes, 16 inches long handle beer bottle brush, 14 inches sports water bottle brush, 10 inches multifunction sponge brush and 4.3 inches spout cleaning brush; You can hang them on hook for drying and storage.

FLEXIBLE DOUBLE ENDED BRUSH:made of high quality soft nylon bristles and stainless steel, flexible two-end long brush, sky blue plastic and it can reuse for many times, easy to push and pull.
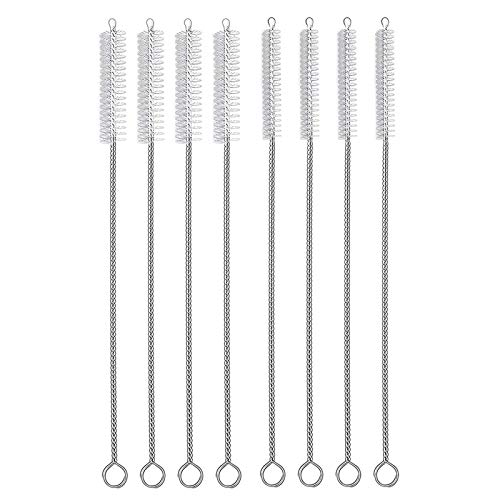
MULTIPLE SIZE » Set includes 4-piece 7.8" x 8 mm straw brush and 4-piece 7.8" x 10 mm straw brush. Overall length: 7.8", Bristle Diameters: 8 mm, 10mm. 7.8" length with 8 mm and 10 mm diameter sturdy brush head, reaching the entire inner surface of the straws and pipes for a thorough clean.
Re‑Install the Capsule Container, Drip Tray, and Water Tank Securely
Where do you start? First, set the capsule container on the left side. Align the outer hard‑plastic shell, then press the inner plastic piece until you hear a click—this guarantees capsule alignment and prevents spills. Next, slide the drip tray into its lower‑front slot. Guide the rails along the machine base, then push until the tray sits flush; confirm drip‑tray leveling by gently rocking it—there should be no wobble. Finally, position the water tank. Match its rear connection to the intake, then lower it until the base sits level. Press the tank firmly so the lid stays sealed and the reservoir contacts the housing. Perform a quick visual check: each part must be fully seated, level, and secure before closing the machine head. The new 3D‑printed pod retention bin adds capacity and prevents coffee residue buildup. Regular descaling helps maintain optimal pressure and flavor consistency. Power‑button placement is typically on the front right corner for easy access.
Run a Quick Test Brew to Verify Cleaning Success
If you’ve just finished re‑installing the capsule container, drip tray, and water tank, run a quick test brew to confirm the cleaning worked. First, verify no capsule is in the chamber, then close and lock the head. Fill the tank with fresh water and place a cup under the spout. For Vertuo models, press the brew button three times within two seconds to start the test brew. Watch for a steady, clear stream that begins within seconds; any splashing, sputtering, or discoloration signals a problem. Stop the cycle early if enough water has passed. This cleaning check validates that the brew path, pod chamber, and spout are unobstructed and that water flows normally, confirming the cleaning succeeded. Using a 50/50 vinegar solution can remove mineral deposits effectively during the cleaning process.
Schedule Regular Nespresso Emptying and Maintenance
Even though you might think a quick rinse is enough, a consistent schedule for emptying and maintenance is essential to keep your Nespresso machine performing optimally. Follow a maintenance cleaning schedule: refill the water tank daily, empty the capsule container and drip tray after each use, and wipe the coffee outlet with a damp cloth. Run a water‑only brew at night to flush residues. Once a week, activate the rinsing cycle by pressing the brew button three times until it flashes blue, then wipe the spout and leave the lid open to air‑dry. Adjust frequency if you brew two‑to‑four cups daily. Monthly, or when the indicator lights, descale according to the manufacturer’s instructions. Remember to recycle used capsules each time you empty the container. Regular descaling prevents lime scale buildup that can cause strange noises and off‑flavors.

Compact construction

Effective and Safe Descaling Solution: Specially formulated for Nespresso machines to ensure thorough descaling without damaging your coffee maker. Perfect for all Nespresso models.

DESCALING KIT Set of 2 descaling kits for Inissia, Pixie, U, Maestria, Gran Maestria, Lattissima, CitiZ, Essenza, Cube, Concept, Expert, Prodigious, Seaco, Siemens, Classic line machines