
Remove the protective wrap, place the Vertuo Pop on a stable surface, and fill the water tank with fresh water. Lock the head, wait ~30 seconds for the light to steady, then trigger the quick‑rinse by pressing the coffee button three times; water will flow for 5‑7 minutes. Insert a dome‑down capsule, lock the lever, and press the button once to brew—press again to stop early or to top‑up. Adjust water volume by holding the button during extraction, and use the app for Bluetooth/Wi‑Fi pairing and maintenance alerts. Keep reading to uncover deeper tips.
Unbox and Set Up Your Vertuo Pop in Minutes
How do you get the Vertuo Pop ready in minutes? You begin with the assembly design, following the quick start guide to remove the protective wrap and locate each component. Position the machine on a stable surface, ensuring power outlet placement is within reach. Rinse the water tank, attach it securely, and fill it with fresh water. Adjust the cup support to match your vessel height, then release the lever lock mechanism. Insert the first capsule with the capsule dome orientation facing down, close the head, and lock the lever. The initial warm‑up timing runs about 30 seconds, after which the steady light signals readiness. Finally, initiate Bluetooth pairing setup if you plan to use app controls. Fill the water tank before use. Remember to perform a water‑only flush cycle periodically to maintain optimal coffee quality. Regular descaling prevents mineral buildup that can impair pressure and shorten the machine’s lifespan. Follow the descaling schedule to keep performance at its best.

Includes: 2 portioned pouches of descaling solution specially designed for your Nespresso machine

EXTENDS MACHINE LIFE: Regular descaling removes mineral deposits and buildup, helping to extend the operational life of your Nespresso Vertuoline coffee maker and maintain optimal performance

Effective and Safe Descaling Solution: Specially formulated for Nespresso machines to ensure thorough descaling without damaging your coffee maker. Perfect for all Nespresso models.
Run the Quick Rinse Cycle Before Your First Brew
Before you brew your first cup, run the quick‑rinse cycle to clear any residual manufacturing debris and verify that the Vertuo Pop’s heating and water‑flow systems are functioning correctly. Fill the tank with fresh water, clean the lid, and reattach it securely; make sure the capsule container, drip tray, and cup support are in place. Close the head, lock it, and wait for the indicator to turn steady—about 30 seconds of heating. Then press the coffee button three times within two seconds; this triple‑press reliably triggers the quick rinse. Water will flow into a 32‑oz (or larger) vessel and continue for 5‑7 minutes without further input. The light steadies again, confirming the cycle is complete and the machine is ready for the first brew. Large vessel is required to collect the rinse water. Regular descaling helps prevent mineral buildup that can impair performance over time. It is also a good idea to check the needle for any coffee grounds that may obstruct water flow. Proper descaling also removes scale residue that can affect heating efficiency.
Insert a Vertuo Capsule – What to Watch For
When you slot a Vertuo capsule into the machine, make sure the dome‑shaped side faces down and the flat side points up so the barcode can be read; this orientation, together with a fully released head, guarantees proper alignment and prevents damage. First, verify the head is released and the cup support is in place; then perform capsule handling by selecting a fresh, unused Vertuo capsule—never reuse a ejected one or insert an OriginalLine model. Place the capsule gently, close the head, and execute lock verification by turning the handle left until the lock symbol appears. If the head resists, re‑check capsule position and obstructions. A smooth lock triggers the barcode scan; a steady light confirms readiness, while a blinking light signals the machine is still heating. Avoid upside‑down insertion, multiple capsules, or damaged pods to maintain peak performance. The machine must be locked before starting the brew cycle. Regularly performing a factory reset can help resolve persistent brewing issues. The high‑pressure pump creates up to 19 bar pressure to force hot water through the coffee grounds, producing a rich crema.

INDULGENT FLAVORS: This assortment of Nespresso Vertuo coffee pods contains a variety of Nespresso capsules: 10 Sweet Vanilla, 10 Golden Caramel, 10 Roasted Hazelnut

Complete Starter Kit – Beginner-Friendly & Ready to Use: Everything you need in one box—refined sealing holder, 100 premium foil seals, lid removal tool, and cleaning brush(NO EMPTY POD). Perfect for home brewing, office coffee breaks, or as a thoughtful gift for coffee lovers. No learning curve required—start refilling your Vertuo pods in minutes

Double Espresso Dolce brews 2.7 FL. OZ.: These Nespresso Vertuo pods are part of the Espresso range that will provide you with a 2.7 fl. oz. serving of a double espresso coffee beverage.
Brew Your First Coffee: Step‑by‑Step Button Press
Ready to launch your first brew? You’ll first power on the Vertuo Pop, fill the tank, and lock the head so the coffee button light blinks while the machine heats for roughly 30 seconds. Wait until the light steadies—this steady cue confirms the brew timing window opens. Place a suitably sized cup on the support, then release the head, insert the capsule dome‑down, and lock it by turning the lever left. Press the coffee button once; the system reads the capsule barcode, instantly loading the pre‑programmed extraction length and water volume. A brief pre‑wetting pause precedes flow, then coffee pours until the programmed volume ends. To stop early, press the button again; a second press after stopping enables a manual top‑up. Finally, turn the handle right to eject the used capsule and rinse the tray. Insert the water tank with fresh drinking water before starting. Ensure the water reservoir is fully filled to avoid delayed heating. Remember to unplug the machine after each use to reduce energy consumption and extend its lifespan.

SIGNATURE COFFEES AND ESPRESSOS: Vertuo Pop+ coffee maker offers a variety of coffee formats in 5 sizes, including 5, 8, 12oz coffees, as well as single and double espressos brewed hot or over ice.

SIGNATURE COFFEES AND ESPRESSOS: Vertuo Pop+ coffee maker offers a variety of coffee formats in 5 sizes, including 5, 8, 12oz coffees, as well as single and double espressos brewed hot or over ice.

More than 30 coffees With different aromas, intensities & flavors
Customize Water Volume for Larger or Smaller Cups
You can fine‑tune the Vertuo Pop’s water output by programming a custom volume for each capsule type, letting you brew larger mugs or smaller espresso shots on demand. To set volume size control, open the head, insert the target capsule, lock the lever, and wait for the steady light. Press and hold the coffee button while brewing, then release a few seconds before the desired level. The machine records the stop point for that capsule, ensuring brewing consistency on subsequent uses. Larger caps require a longer press; smaller caps need an earlier release. Each capsule type stores its own setting, so adjusting a Gran Lungo won’t affect Espresso defaults. Resetting with the five‑press sequence restores factory volumes when needed. Press and hold the button until the target volume is reached, then release to program the setting. Programmed volume is stored for each capsule type. The proprietary capsule system locks in flavor and freshness for every brew. Proper grind size is crucial for achieving optimal extraction and flavor balance. Following the regular cleaning schedule helps maintain consistent performance and prolong the machine’s lifespan.

1️⃣ Smooth & Balanced 150ml Daily Coffee. Enjoy a smooth and balanced 150ml/5oz coffee with rich aroma and light crema. Designed with a smart barcode optimized for Vertuo Pop, Next & Plus machines for accurate recognition and consistent daily brewing.
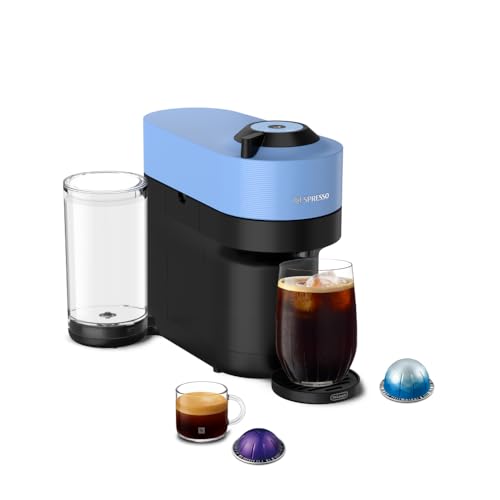
More than 30 coffees With different aromas, intensities & flavors

1. Perfect Fit for Nespresso Vertuo Pop+ Specifically engineered for nespresso vertuo replacement parts, this used pod holder is a seamless match for your Nespresso Vertuo pop/Pop+ and Deluxe machines. It ensures a secure, wobble-free connection , making it the ideal choice for replacing lost or damaged components.
Stop, Top‑Up, and Eject Capsules Without a Mess
Fine‑tuning the water volume gives you control over the brew size, but the real test of a mess espresso machine is how cleanly it stops, tops up, and ejects the capsule. When brew timing reaches the programmed limit, the Pop cuts power automatically; if you need a shorter pour, press the button after flow starts to avoid early termination that leaves excess liquid in the capsule. For a smaller cup, add measured hot water post‑brew rather than forcing a second cycle, preserving flavor balance. Immediately after extraction, lift the lever to the release position; the head pops up, and the used capsule drops into the side container, ensuring efficient capsule disposal. Keep a drip‑catching cup under the outlet and close the head promptly to prevent splashes and residual moisture. Check the capsule holder regularly to avoid overflow. Regularly empty the drip tray to prevent water buildup and maintain hygiene. Performing a factory reset can resolve lingering errors after repeated malfunctions. The espresso machine market offers both pod and traditional options, each with distinct trade‑offs in convenience and flavor control.
Maintain Your Vertuo Pop: Water, Ice, Cleaning
Although the Vertuo Pop’s compact design simplifies daily use, maintaining optimal performance hinges on disciplined water and ice handling plus regular cleaning. You should rinse the water tank and lid with fresh drinking water before each refill, then reattach it securely; empty it before any storage to avoid stagnation. Water filtration improves flavor and cuts mineral buildup, while Ice storage is limited to post‑brew addition—never pour ice into the tank. Clean the machine monthly, or sooner if residue appears, by washing the capsule container, drip tray, and cup support in hot water with a mild, odorless detergent. Run a rinse cycle (three quick button presses, 1 L container below) after cleaning, after long idle periods, and before regular use resumes. This routine minimizes scaling and preserves brew quality. Regular descaling should be performed every 2‑3 months to prevent mineral buildup. Refer to the safety precautions in the guide before opening the machine to avoid damage. Descaling also helps maintain optimal brew temperature for consistent flavor. Daily residue removal with a soft brush prevents coffee oil buildup on the group head.

COMPATIBLE WITH ALL VERTUO MACHINES – Designed for use with all Nespresso VertuoLine coffee machines for convenient routine cleaning and maintenance.

12-Month Maintenance Kit: Our package includes 1 bottle of descaling solution, enough for 4 uses, 12 Vertuo cleaning tablets, and 1 reusable Vertuo pod. This kit provides all the necessary tools for maintaining your machine’s performance.

ECO FRIENDLY OPTION: Our Vertuo descaling kit is different from traditional liquid descalers. It contains concentrated citric acid powder specially formulated for Vertuo machines—just add water before use. No plastic bottles, no unnecessary packaging. It’s eco-friendly, cost-effective, and helps restore the fresh, rich taste of your coffee. Clean smarter, save more, and reduce waste—without compromising performance.
Connect Your Vertuo Pop to the Nespresso App for Bluetooth & Wi‑Fi
Because the Vertuo Pop’s smart features depend on seamless connectivity, the setup process must be executed methodically: first install the latest Nespresso App, keep the machine powered and heating, and guarantee Bluetooth, Wi‑Fi, and location services are active on your device. Open the app, tap the machine icon, and start the Bluetooth pairing flow; placing the phone directly on the machine improves discovery and reduces interference compared with manual pairing. Once the light steadies, the app transitions to Wi‑Fi setup, automatically scanning networks; refresh if none appear, select your 2.4 GHz SSID, and enter the password. Confirm the “Connected” status, then verify that app features like care alerts activate. If pairing fails, unpair, reset the machine, and repeat while it stays powered. The light blinks while machine heats for about 30 seconds before becoming steady. Proper water reservoir management ensures consistent pressure for optimal espresso extraction.