
Remove the tape and foam, rinse the brew head and tank, then run a quick water‑only flush to prime the pump. Fill the water tank to the MAX line, power on, and wait for the lights to go solid, indicating the machine’s preheated. Snap the portafilter into the group head, wipe the gasket, and lock it firm. Grind beans fine, dose 14‑20 g, and pull a 25‑30 second shot, watching the crema rise. Purge the steam wand, submerge it just below the milk surface, tilt for air, then lower for a whirlpool, stopping at 140‑145 °F. Empty the drip tray, wipe the wand, and run a daily water flush. Descale with a 4‑to‑1 water‑to‑descaler mix, rinse, and reset the warning light; the next steps will show you how to fine‑tune every detail.
Remove Protective Parts & Perform the First‑Time Flush
Ready to get your Casabrew humming? Start with protective film removal: peel off every tape, foam, and shipping restraint from the machine, portafilter, baskets, drip tray, and water tank. Make sure no packaging debris sits near the group head, steam wand, or drip area. Seat the portafilter, rinse the basket under warm water, and wipe the brew‑head screen if dust or oils linger. Fill the reservoir with fresh water, place an empty cup under the brew head, and position the steam wand over a drain. Power on and run the initial water flush—no coffee, just water—through the brew head and steam wand. Repeat until the flow runs clear, then dry and reinstall all parts. Your Casabrew is now ready for brewing. weekly flushing cycle to maintain water flow and prevent scaling. Regular descaling removes mineral buildup that can impair pressure and shorten the machine’s lifespan. Proper descaling also protects the pump seals from premature wear.
Install & Fill the Unabrew Water Tank, Then Power On
Once you’ve cleared the protective film, lift the rear‑top water tank out carefully, check for the orange/red rubber plug at its base, pull the plug out, then fill the tank with room‑temperature water up to the “MAX” line. After filling, rinse the tank briefly to remove any debris, then set it back into the machine with proper Tank positioning. Align the inlet valve and guarantee the tank seats firmly; a misaligned tank will block water flow and affect brewing. Close the reservoir cover if present, then plug the machine into power. Press the ON button; the indicator lights will flash briefly, confirming the system is energized. The machine is now ready for the next step, with water correctly installed and the power on. Pre‑heating takes: Allow approximately one minute for the pre‑heating cycle while the lights flash. Properly prime the pump before brewing to ensure consistent pressure. Regular descaling prevents mineral buildup, which can cause scale formation and reduce brewing efficiency. Daily maintenance helps keep the brew group free of coffee oils and residues.
Preheat the Machine & Verify Ready‑Signal Lights
Need to get the machine heating before you pull a shot? Press the power button; the preheat cycle starts instantly. Watch the control lights flash—those are your Lamp diagnostics. When the flashing stops and every button glows solid, you’ve hit the correct Signal timing and the machine is brew‑ready. LCD models will light up at startup, but the same rule applies: wait for steady illumination. Verify the steam indicator stays lit if you’re using steam preheat. Before brewing, confirm the power plug is secure and both coffee buttons are fully lit. If any light still flashes, hold off—no stable pattern means the brew path isn’t heated yet. Once solid lights dominate, you can proceed to extraction. Remove orange plug before starting the preheat to ensure proper water flow. Regular descaling prevents mineral buildup and maintains optimal pressure for consistent espresso quality. Using a heat‑diffusing pad can help distribute heat evenly on electric stovetops, reducing the risk of scorching.
Prepare the Portafilter & Brew Head for a Clean Extraction
Start by snapping the portafilter into the group head so the lock clicks firmly, then make sure the filter basket is dry, correctly sized, and fully seated. Verify basket sealing by wiping the rim and group head gasket; any stray grounds break pressure consistency. Choose the right basket for the shot—single or double—to match dose and maintain even water flow. Clean the brew head with a brush, then run a hot‑water flush without the portafilter, catching runoff in an empty cup. Inspect the basket edge and portafilter lock for debris before each pull. After brewing, rinse the portafilter and basket, dry thoroughly, and store them dry to preserve sealing and consistent extraction. Rinse the portafilter immediately after use to prevent coffee residue buildup. Maintaining a consistent water temperature is crucial for optimal extraction and flavor balance. The pressurized basket helps compensate for uneven tamping by creating a uniform extraction pressure. Properly aligning the portafilter ensures a tight seal that prevents channeling and promotes even extraction.

DESIGN: The cleaning bristles are arranged in an arc crosswise and horizontally to effectively remove the residual powder in the powder basket. For cafe baristas, it saves time to wash the portafilter with water each time, making the operation more efficient.

360° FLEXIBLE COFFEE CLEANING BRUSH- The espresso brush is made of non-scratch and odorless nylon bristles. Black stiff bristles are able to be positioned to scrub at all angles, get into the tiny holes making cleaning a breeze, it is suitable for any surface and hard to reach areas.

HOW TO USE THE Portafilter Cleaning Brush: 360° Rotate the cleaning brush to clean the Espresso Portafilter basket filter, so that thoroughly to remove residual powder and avoid clogging.
Choose the Right Grind & Dose for Single or Double Shots
Ever wonder how to dial in the perfect grind and dose for your Casabrew? Start with a table‑salt‑fine grind; this level gives the right resistance for a 51 mm portafilter. Aim for grind consistency; even a 0.1 mm shift can swing flow dramatically. For a double, weigh 14–20 g, but most users land at 15–17 g for reliable basket fit. A single shot drops to roughly half that, staying within the basket’s capacity. Use a calibrated scale for dose precision—tiny adjustments fine‑tune extraction without overfilling. If the shot runs fast, tighten the grind or add a gram; if it drags, coarsen a bit or shave off a gram. Tweak one variable at a time, and you’ll lock in repeatable, balanced espresso. Freshly grinding beans at home maximizes nutrient retention and flavor. Maintaining a consistent grind is crucial for steady extraction and preventing channeling. Selecting a high‑quality burr grinder ensures grind uniformity and reduces the risk of channeling. Proper tamping pressure of 30‑35 psi helps create an even puck and avoids channeling.
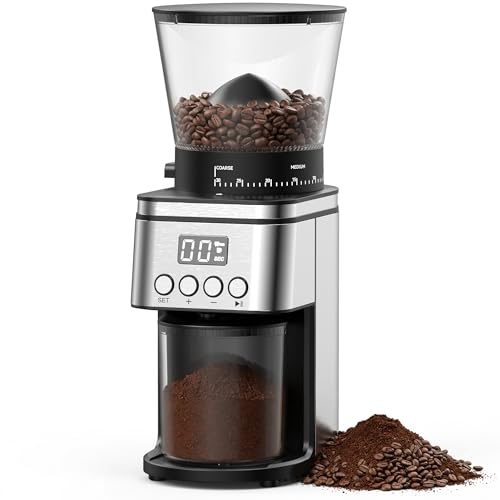
Professional Grinding Precision:Coffee grinder with 30 precise grind settings—from espresso-fine to French press-coarse—deliver consistent particle size for optimal extraction. Hardened stainless steel conical burrs ensure consistent and uniform grinding.
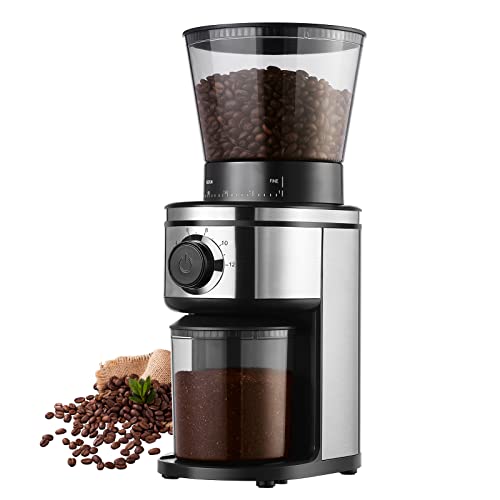
【Durable Conical Burr】With 40-millimeter stainless steel conical burrs, OLLYGRIN burr coffee grinder ensure optimal flavor extraction and create uniform grounds.

Premium 40 Millimeter Stainless Steel Conical Burr: Designed to minimize grinding heat and protect the essential oils in the coffee bean, creating uniform grounds for optimal flavor extraction.
Brew Your First Espresso: Button Presses, Timing, and Expected Results
Once the Casabrew’s lights are fully lit, place an empty portafilter, hold the two‑cup and steam buttons for five seconds to flush, then press the single‑ or double‑cup brew button; the pump will run about eight to ten seconds, followed by a 20‑second extraction that tapers into slow drips, delivering a finished espresso in roughly 30 seconds. You’ve already pre‑heated, so the espresso timing is locked in. The button sequence—flush, then brew—ensures hot water runs through the group before coffee contacts the grounds. Expect a steady stream for the first 8‑10 seconds, then a gradual slowdown as the shot finishes. A clean, dry portafilter and a cup beneath the group head catch the output, which should be rich, aromatic, and ready to serve immediately. Follow this routine each time for consistent first‑shot quality. The indicator piece rises when the drip tray fills, signaling that the machine needs emptying. Proper grind size is crucial for achieving the right extraction balance. The extraction pressure in espresso creates a distinct crema compared to the French press’s immersion method. Using consistent water temperature helps maintain stable pressure and flavor extraction.
Steam Milk Like a Barista: Purge, Position, and Froth Properly
Now that your espresso shot is locked in, turn your attention to the steam wand. First, purge the wand briefly—open the valve for a second to clear water and residual milk, then close it. Use cold milk in a cold pitcher, filling just below the spout to leave room for expansion. For foam milk positioning, submerge the tip just beneath the surface and tilt the pitcher slightly off‑center; you’ll hear a gentle tearing sound as air injects. After 5‑10 seconds, lower the wand deeper and tilt the pitcher to create a whirlpool, achieving foam consistency control. Stop steaming at about 140‑145°F, then tap, swirl, and wipe the wand, purging again to finish cleanly. The air injection process creates a velvety micro‑foam that enhances texture and flavor. Understanding foam density helps you tailor the texture to your preferred coffee style.

【Premium Food-Grade 304 Stainless Steel】Milk frother cup is made of premium food-grade 304 stainless steel, this non-toxic, odorless coffee pitcher ensures safe daily food contact. It delivers outstanding rustproof, stain-resistant and heat-resistant performance for durable use. Adopting seamless welding technology, the integrated body and handle feature solid structure.

☕【Fashion & Durable】The milk frothing pitcher is made of high quality 304 stainless steel, strong and durable, exquisite workmanship.non-rust,anti-corrosion,unbreakable for daily use. Very easy to clean after use.

Professional 20-Bar Extraction for Café-Quality Espresso: Powered by a stable 20-bar pressure system, this espresso machine delivers full aroma extraction and rich crema for café-quality espresso at home. Efficient extraction helps maximize coffee flavor while using less ground coffee per brew, making it suitable for daily espresso preparation
Daily Care: Empty Drip Tray, Clean Steam Wand, and Refill Water
If you keep the drip tray empty, wipe the wand right after frothing, and refill the water tank with fresh filtered water, your Casabrew will stay ready for the next shot without overflow, milk buildup, or mineral deposits. Empty the tray after each session, rinse under warm water, dry, and reinstall to avoid odors. Immediately after frothing, perform steam wand cleaning: wipe with a damp cloth, purge briefly, and use the needle if clogged. Rinse the water tank regularly, refill only with filtered water, and check the max‑fill line to prevent spills. Follow a maintenance schedule that includes a quick water‑only cycle, group‑head wipe, and portafilter basket rinse. These habits keep extraction steady and your machine reliable. Perform a water‑only flush each day to remove residual oils and ensure consistent brewing. Regular descaling prevents mineral buildup and extends the lifespan of your espresso machine.
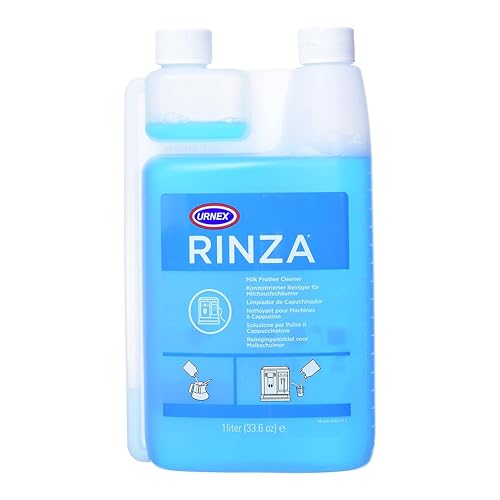
Milk frother cleaner breaks down milk protein buildup.

Keep your espresso machine performing flawlessly with this steam wand cleaning needle. The sharp 304 STAINLESS STEEL NEEDLE easily pierces dried milk residue and blockages to restore pressure for perfect microfoam. The material makes it a durable espresso steam wand cleaning tool.
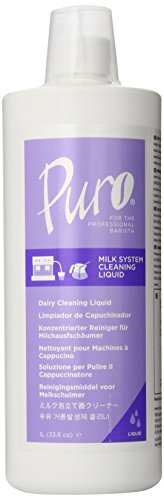
Cleans traditional and automatic milk steaming devices
Unabrew Descaling & Reset Procedure, Follow‑Up Steps
When the machine’s water tank is cool, fill it to the MAX line with a 4‑to‑1 water‑to‑descaler mix (or 100 : 3 water‑to‑citric‑acid if you prefer) and place a cup under the brew outlet. Start the descaling routine, let about 100 ml dispense, then pause; repeat three more bursts, waiting five minutes between each. After the solution empties, run two rinse cycles with fresh tap water, emptying the drip tray each time. When the final rinse finishes, press and hold the 1‑cup + 2‑cup + Steam buttons for three seconds to clear the warning light. Stick to a monthly descaling schedule to keep flow steady and avoid mineral buildup. Regularly checking the descaling indicator helps maintain optimal performance.

2-Pack Coffee Descaler and Cleaner - Clean and rinse away residue and oil buildup in your coffee maker with Impresa's Coffee Descaler Solution. Our highly effective solution comes with two 8-ounce bottles - enough for 4 descaling sessions (2 uses per bottle)

EXCEPTIONAL RESULTS: Introducing Tillbrook Coffee Machine Descaler specifically formulated for Breville—the best choice for removing hard water buildup, oils, and residue. It’s essential to clean and descale Breville Espresso Machines every 3-4 months to ensure proper functioning of your machine, to enhance the taste of coffee, and to extend the life of the machine.
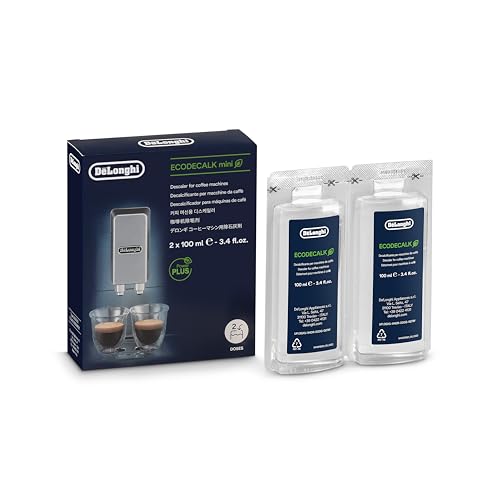
Eco-friendly universal descaling solution that's gentle on your coffee maker