
Unbox the machine, verify all parts, and place it on a stable surface; fill the water reservoir to the MIN line, close the lid, and plug in. Press the power button, wait for the brew‑button LEDs to stay solid, then run a water‑only cycle to prime the pump. Load 8 g (single) or 14 g (double) ground coffee, distribute, tamp 30 psi, insert the portafilter, and press SINGLE‑SHOT or DOUBLE‑SHOT. Attach the milk reservoir, set froth strength, and steam milk to 140‑150 °F. Finish with the automatic clean cycle; the next sections will show you how to troubleshoot common issues.
Unbox and Inspect Your Chefman Espresso Machine
When you open the box, verify that the portafilter, single‑ and double‑shot filter baskets, milk‑frother attachment, tamper, scoop, and both the user guide and quick‑start guide are all present. Next, assess the exterior dimensions: footprint 11–11.5 inches front‑to‑back, 8.5 inches side‑to‑side, height 12.5 inches, with a 5‑inch forward‑extending handle. Confirm the touchscreen control panel aligns with the machine’s front housing and that the two‑prong power cord measures 34–35 inches. Check the four rubber feet for stability and locate the cup‑warming area. Examine the milk‑frother attachment on the side housing; ensure the froth reservoir tilts upward and detaches cleanly. Finally, locate the warranty guide within the documentation bundle, confirming it matches the machine’s design specifications before proceeding. The machine’s power rating is 120 V / 60 Hz. Regular descaling helps maintain optimal pressure and prevents mineral buildup, extending the machine’s lifespan. Descaling frequency should be every 3–6 months depending on water hardness. Performing descaling with a commercial descaling solution can improve efficiency and protect internal components.
Set Up and Fill the Water Tank Correctly
If you locate the water reservoir on the back or side platform of your Chefman espresso machine, you can begin the fill process immediately. First, verify Reservoir placement; some models let you fill with the tank attached, while others require removal. Gently lift the hinged lid, tilt the reservoir forward, and pour cold, filtered water up to the MIN line, never exceeding the MAX marking. Avoid warm or hot water; correct water temperature preserves internal seals and prevents performance issues. After filling, close the lid securely, then reposition the reservoir so it seats tightly on the platform. Make sure the tank is firmly locked to avoid misalignment, which could disrupt the water‑delivery system during brewing. Prime the pumps before the first brew by running a water cycle without coffee. Regularly descale the machine to prevent mineral buildup and maintain optimal brewing performance. Descaling removes limescale deposits that can cause clogs and reduce heating efficiency. The compact design of Nespresso machines relies on a high‑pressure pump to extract rich espresso quickly.
Power On, Preheat, and Check Ready‑State Indicators
Plug the machine in first, then press the side‑mounted switch or power button to start the heating cycle. After you power on, a heat‑proof cup must already sit under the brew head. The SINGLE‑SHOT, DOUBLE‑SHOT, and MANUAL buttons begin to pulse slowly; this pulsing indicator signals that internal heating is active. Watch the indicator cues: when the heating cycle finishes, the pulse stops and the brew buttons illuminate solidly. That solid light is the primary ready‑state indicator, confirming the machine is prepared for extraction. If a blinking light persists, the unit is still warming up and you should wait. Only press a brew button after the solid indicator appears, ensuring the machine has reached the correct temperature. The water reservoir should be filled to at least half‑full before beginning the heating cycle. Using a consistent grind size helps achieve a balanced extraction. Proper water temperature is essential for extracting the coffee’s full flavor profile.
Prime the Machine for First Use or After a Break
Now that the machine shows a solid ready‑state light, you need to prime it before brewing. Begin by filling the water reservoir with cool, fresh water between the MIN and MAX markings; do not exceed the MAX line. Seat the reservoir securely, guaranteeing full alignment on the slides. Next, prime the steam/milk frother: fill its container with water, keep the assembly connected, and run the prime cycle. Empty the water afterward and load milk for regular use. Insert an empty portafilter, lock it in place, and place a heat‑proof cup beneath the brew head. Activate the single‑shot or double‑shot button to flush; repeat until water flows steadily, eliminating air bubbles. This routine constitutes essential machine maintenance and guarantees proper pressure calibration for reliable espresso extraction. Ensure the milk frother is fully seated before powering on. For faster start‑up, consider using the machine’s pre‑heat shortcut feature. Remember to check the water tank for secure placement before each use. Regularly cleaning the group head prevents coffee oil buildup and maintains flavor quality.
Load and Tamp Coffee in the Chefman Portafilter
How much coffee should you load into the Chefman portafilter? You’ll need 8 g for a single shot or 14 g for a double, using finely ground espresso coffee. First, perform Grind size selection: choose a particle size that passes through a 400‑µm screen but retains enough resistance for proper extraction. Next, distribute the grounds evenly. Level the coffee bed with a distribution tool or a fingertip sweep, removing excess from the rim. Position the portafilter on a tamping mat, aligning it with the counter edge for optimal leverage; Portafilter ergonomics demand a stable, level platform. Apply the first tamp at roughly 15 lb, then a second press at 20–30 lb, keeping the tamper parallel to the basket. Even coffee bed is essential to prevent channeling and ensure consistent extraction. Inspect the puck for flatness, brush away loose grounds, and ensure the rim is clean before insertion. Consistent pressure of 30‑35 psi helps achieve uniform extraction across the puck. Proper water temperature of 90–96 °C is crucial for extracting the full flavor profile. A well‑calibrated burr grinder ensures the fine, consistent grind needed for optimal extraction.
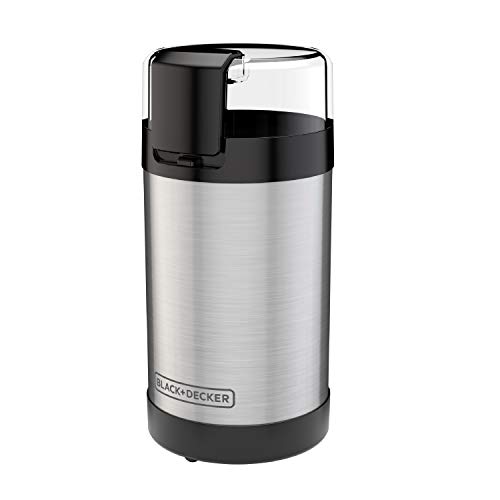
STAINLESS STEEL BLADES AND BOWL - The sharp blades and durable grinding bowl are built to last, delivering uniform grinds with every use

EASILY SELECT GRIND SIZE AND CUPS OF BREWED COFFEE: Whether you need a fine grind size for espresso or a coarse grind for French press, we've got you covered. Just turn the grinder's adjustable selection ring. Grinds enough to brew 4-14 cups.

Electric coffee bean grinder appliance for home use
Brew a Single or Double Espresso With Your Chefman Machine
First, make sure the machine is fully heated—once the brew‑button LEDs stop pulsing and stay solid, you’re ready to start. Place a heat‑proof cup on the drip tray, set the steam knob to OFF, and verify the portafilter basket matches the selected button. Press the SINGLE‑SHOT button for a one‑oz shot or the DOUBLE‑SHOT button for a two‑oz shot; the LED will remain lit for the brewing cycle. The preset timing delivers a 15‑second single or a 25‑second double, ensuring consistent espresso strength. Monitor pressure during brewing to stay within the espresso pressure range. If you need to adjust strength, use the MANUAL button: start the brew, then stop when the desired volume is reached. After the beep, remove the cup, let pressure drop, detach the portafilter, discard grounds, and wipe the brew area. Properly pre‑heat the portafilter before brewing helps maintain optimal extraction temperature. Consistent tamping pressure of 30–40 lb is crucial for achieving balanced extraction and stable flow. Using a grind that is too coarse can cause channeling and result in weak, under‑extracted espresso.
Attach the Milk Reservoir and Set Froth Strength
If you’ve already heated the machine and attached the portafilter, the next step is to mount the milk reservoir and set the froth strength before you begin any milk‑based beverage. First, fill the Milk reservoir with cold milk between the MIN and MAX lines; never use hot milk or exceed the MAX mark. Tilt the reservoir upward, then slide it straight onto the unit until it clicks into place. Verify the reservoir is seated, because the cappuccino function will not operate if it’s loose. Next, locate the froth strength control. Choose “Standard” for regular foam or “Extra” for a denser froth, matching the texture to your drink style. Finally, position the silver froth dispensing tube lever over a heat‑proof cup on the metal coaster, ensuring the cup sits directly beneath the dispensing point before you press any frothing button. For the best micro‑foam, aim for a milk temperature of 140–150 °F (60–65 °C) while frothing. pre‑chilling the frother helps achieve a richer, more stable foam. Using barista‑style almond milk can further improve foam stability and texture.

The Breville Temp Control Milk Jug includes an integrated thermometer indicator strip to help you texture milk to the optimum temperature range; Upgrade your cappuccinos, lattes and cortados
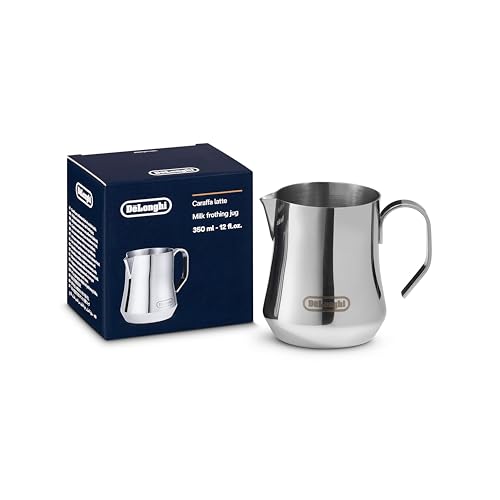
Stainless Steel Milk Frothing Jug

Heavy-duty 304 Stainless Steel: Our silver steaming pitcher is made of food-grade 304 steel-rust-proof, heat-resistant, and incredibly easy to clean; No scrubbing caked-on milk; Built for daily use and fully dishwasher safe for zero-hassle cleanup
Steam Milk for a Cappuccino With Your Chefman Espresso Machine
Ready to steam milk for a perfect cappuccino? First, fill the pitcher with cold, partially skimmed milk, staying below the max line. Pull the espresso shot, then position the wand tip just under the milk surface. Activate steam; listen for a light tearing sound as air enters, creating a thin layer of foam. Keep this aeration short to preserve froth consistency. Lower the pitcher as the milk expands, maintaining the wand near the surface until a glossy microfoam forms. Submerge the wand deeper to heat the milk without adding more air, aiming for a paint‑like texture. Stop when the pitcher feels hot or the milk temperature reaches 135–145 °F. Turn off steam, wipe the wand, purge briefly, and immediately combine the steamed milk with the espresso. Position the wand tip just below the milk surface to introduce air. Micro‑foam provides a velvety texture that enhances the espresso’s flavor.

Perfect Combination Of Milk Frothing Pitcher And Latte Art Pen: The milk frother jug can be used in different ways: froth or steam milk for lattes; measure liquids; serve milk or cream. Featured with a latte art pen which can shape kinds of beautiful coffee pattern. Perfect for making frothing or steaming milk for espresso, cappuccino or hot chocolate. Be your own barista in home and office.

【Food Grade Material】This milk frothing pitcher is made of high-quality 304 stainless steel, which is rust proof, stain proof, and heat resistant. It has a stylish appearance and is very easy to clean after use.

High-Quality Material: Made of 18/8 stainless steel, this milk frothing pitcher is rust-free, easy to clean, and dishwasher safe. The well-polished surface and clear internal measuring scales help you accurately measure the amount of liquid.
Run the Automatic Cleaning Cycle
Before you start the automatic cleaning cycle, make sure the machine is turned off, unplugged, and all metal parts have cooled; then remove the milk reservoir, empty any remaining milk, and place an empty portafilter basket in the brew head. Position a large empty cup under the brew head, verify water remains in the reservoir, and refill the milk reservoir with fresh water. Return the reservoir, set the froth strength to Extra, and press CLEAN. The machine will dispense hot water and steam in bursts; keep the cup in place until the three‑beep signal and illuminated buttons indicate completion. Follow this Cleaning schedule weekly; empty both reservoirs, allow parts to cool, and wipe the exterior. Maintenance tips include rinsing with fresh water after vinegar descaling and drying all components before reuse. Vinegar odor can be strong, so ensure the area is well‑ventilated during the cycle.
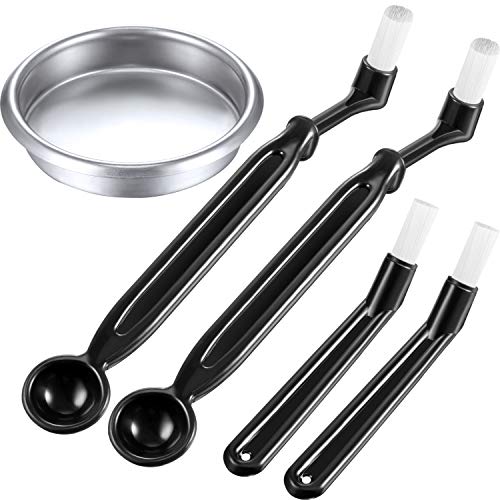
Function: the sturdy stiff thick nylon bristles brush can clean what coffee remains and your coffee grinder burr blades easily, fit for coffee grinder, espresso machine, milk frothers, bean grain and coffee maker
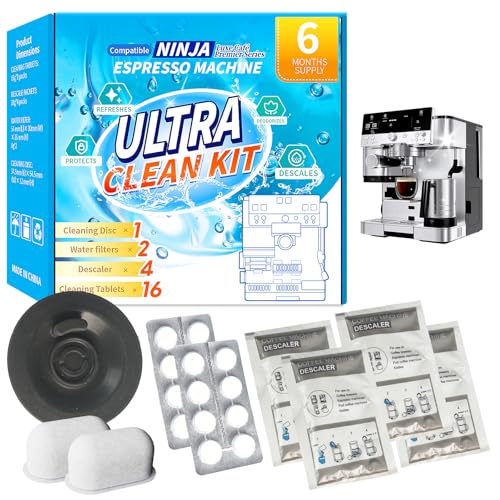
COMPLETE KIT: 6-month supply including descaling packets, cleaning tablets, water filters, and an espresso cleaning disc for comprehensive machine maintenance

【Coffee Brush Package Included】- 5pcs coffee cleaning brush in one pack, including espresso machine brush, long handle espresso brush, coffee grinder brush, espresso portafilter/milk frother pitcher spouts brush and espresso steam wand brush.
Troubleshoot Common Espresso Issues
When the Chefman espresso machine produces weak, inconsistent shots or fails to start, the root cause typically lies in power, water supply, pressure, grind, or blockage issues. First, verify the unit is plugged in, the outlet is live, and the internal fuse isn’t blown; test a different socket if the machine appears dead. Next, confirm the water reservoir is full, seated, and free of blockages; inspect the pump and lines for restricted flow. Then, address low pressure by adjusting grind consistency: use a finer grind, increase dose, and tamp evenly to create resistance. Clean the portafilter, basket, and group head to remove oil buildup, and descale regularly to prevent mineral clogs that impede pressure pressure and extraction. Use fresh coffee to ensure proper crema formation and avoid under‑extraction.

2-Pack Coffee Descaler and Cleaner - Clean and rinse away residue and oil buildup in your coffee maker with Impresa's Coffee Descaler Solution. Our highly effective solution comes with two 8-ounce bottles - enough for 4 descaling sessions (2 uses per bottle)

EXCEPTIONAL RESULTS: Introducing Tillbrook Coffee Machine Descaler specifically formulated for Breville—the best choice for removing hard water buildup, oils, and residue. It’s essential to clean and descale Breville Espresso Machines every 3-4 months to ensure proper functioning of your machine, to enhance the taste of coffee, and to extend the life of the machine.
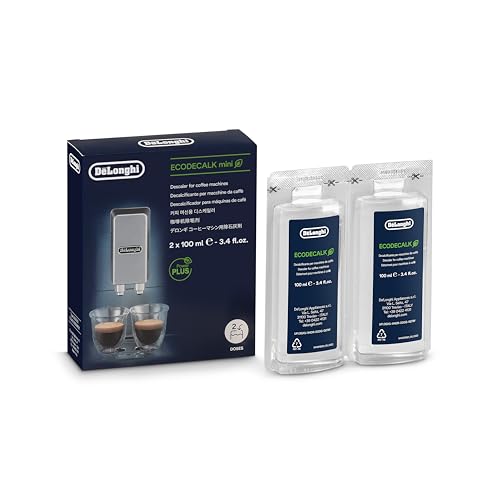
Eco-friendly universal descaling solution that's gentle on your coffee maker