
Fill the water tank, making sure the float moves freely, then run a quick rinse until the machine signals it’s hot. Insert a clean, dry portafilter, dose about 7 g for a single (or 14 g for a double), distribute and tamp evenly, and lock it in. Set pressure to ~10 bar and temperature to 90‑96 °C, then choose your brew size and hold the selector for a few seconds to customize timing. Steam milk by placing the wand tip 1 cm below the surface, angling 15‑20°, and heating to ~60 °C before wiping and purging. Keep the drip tray empty, descale regularly, and replace the filter after each descaling cycle. If you follow these steps, you’ll master the basics and uncover deeper tips.
Clean, Fill, and Pre‑Heat the Espresso Machine
Before you start brewing, make sure the water tank is filled, seated properly, and free of any mineral buildup. Remove the tank, fill it with fresh water, and verify the magnetic float moves freely; a stuck float indicates a blockage. Check tank sealing by pressing the tank lightly—no leaks should appear. Place the tank back, ensuring a snug fit so water can flow uninterrupted. Turn on the machine and let it pre‑heat; the indicator will signal when the circuit reaches brewing temperature. While it warms, run a quick rinse cycle with clean water, no coffee, to clear any residual descaling solution. Finally, wipe the drip tray, brewing head, and steam nozzle, and confirm the steam float is unobstructed before you begin espresso extraction. Ensure the milk is chilled before frothing to achieve optimal foam consistency. Regular descaling helps maintain flavor integrity and prolongs machine lifespan. Proper mineral buildup removal also preserves optimal pressure for consistent extraction. Group head flushing removes coffee oil residue that can degrade taste over time.
Load the Portafilter and Measure Coffee Dose
Once the machine’s heated up, grab a clean, dry portafilter, insert the appropriate filter basket, and make sure the rim is free of moisture before you start dosing. Choose a single or double basket based on shot size, and verify it matches your Krups model; pressurized baskets forgive grind variance, while non‑pressurized ones demand precision. Use the basket’s “MAX” line or a scale for dose consistency calibration—typically 7 g for a single shot, double that for a double. Distribute grounds evenly, avoiding premature compression, and keep the surface level. With Portafilter ergonomics in mind, hold the portafilter firmly, insert it into the group head with a steady motion, and lock it securely to prevent disturbance before extraction. Avoid early reinsertion while water drips remain to prevent extraction issues. Regularly clean the group head to remove coffee oil buildup, which can cause flavor drift and affect extraction quality. Understanding the role of the basket helps you select the proper size for consistent shots. Proper water temperature is crucial for achieving optimal extraction and crema development.
Set Espresso Machine Pressure & Temperature for Extraction
If you want consistent espresso, set both pressure and temperature before pulling a shot. Begin with pressure calibration: locate the pump screw on rotary‑pump Krups models, or consult the service menu for vibratory units. Adjust the screw until a blind‑basket reading reads roughly 10 bar, which typically translates to 9 bar dynamic pressure at the group head. Verify the real‑brew pressure with the built‑in gauge while water flows; fine‑tune if the reading drifts. Next, engage temperature profiling through the machine’s menu. Choose the standard range of 90‑96 °C and lock the setting; avoid extreme heat to prevent bitterness. Make sure the water tank is filled with properly softened water, then run a short purge to stabilize temperature. With pressure calibrated and temperature profiled, you’re ready for extraction. Dynamic pressure is lower than static pressure because it is measured during actual water flow. Consistent tamping pressure of 30–40 lb helps maintain uniform resistance and flow rate across shots. Understanding brew pressure is essential because true espresso requires approximately 9 bar, far beyond the capabilities of standard drip coffee makers.

𝗕𝗔𝗥𝗜𝗦𝗧𝗔-𝗤𝗨𝗔𝗟𝗜𝗧𝗬 𝗥𝗘𝗦𝗨𝗟𝗧𝗦 𝗔𝗧 𝗛𝗢𝗠𝗘: Become your own barista with professional-grade espresso, delivering rich, aromatic coffee crafted to perfection

A MUST HAVE PRESSURE GAUGE: Special design for coffee machine with E-61 grouphead, help you monitor the extraction of the coffee easily.

Replacement for SP0001567 - MacMaxe brew pressure gauge designed as a compatible replacement for espresso machines using part number SP0001567.
Brew Espresso: Selector Settings, Timing, and Volume
Wondering how to dial in the perfect shot? Start by turning the recipe dial or pressing the recipe button to choose Espresso, Espresso x2, Lungo, Lungo x2, Americano, or Americano x2. The default espresso volume is 30 ml; double‑espresso is 60 ml. For custom brew timing and volume control, hold the recipe control ~3 seconds until it blinks, then press Start/Stop Brew to begin. Watch the flow; the machine will stop automatically at the preset volume, or you can press Start/Stop Brew again to halt at your target. Adjust the programmed range—20‑60 ml for single espresso, 40‑120 ml for double—using a filled portafilter and an empty cup to match your cup size. Americano recipes split the total (≈120 ml) into espresso and hot‑water phases, each adjustable within their own limits. Use these steps to fine‑tune each shot’s strength and consistency. Pressing toggle switches between favorite A and favorite B. The Moka pot’s stovetop brewing method creates a rich, aromatic coffee that can serve as a useful reference when calibrating espresso extraction. Nespresso’s proprietary capsule system locks in flavor and freshness, ensuring consistent quality across brews. The machine’s high‑pressure pump generates up to 19 bar of force, which is essential for extracting a crema‑rich espresso quickly.

304 STAINLESS STEEL: Amrules 12oz creamer pitcher are crafted of 18/8 food grade stainless steel. The pitcher features external mirror finish and internal hairline finish. It is sturdy, durability, rust-resistant and resistant to deformation

Fits 51mm Delonghi and CASABREWS Portafilters: Designed to fit Delonghi, CASABREWS CM5418 / 3700, atatix and other 51mm espresso machines

CAPACITY: Capable of holding up to 4 cups of rich espresso, this carafe provides you have plenty of your favorite brew to satisfy your caffeine cravings
Steam Milk With Your Espresso Machine – Wand Position, Temperature, Technique
While the steam wand is poised just below the milk surface, open the valve with a quick half‑turn to let a steady stream of steam flow. Position the tip about a centimeter under the surface, keeping a slight wand angle of 15‑20° to create a gentle vortex. Use cold, fresh milk in a chilled metal pitcher, filling it halfway. As the milk expands, lower the pitcher steadily, maintaining submersion without shaking. Listen for the “SSSST…SSSST” sound—signaling proper air incorporation. Heat until the milk reaches roughly 60 °C; stop when you feel the pitcher warm and the foam is glossy, indicating ideal milk texture. Avoid over‑heating to preserve sweetness and foam stability. Selecting a barista‑style almond milk can improve foam quality. For a richer, velvety micro‑foam, consider using a steam‑based frother that applies higher pressure and temperature control.

Make Your Favorite Espresso Coffee At Home: The CASABREWS coffee machine with milk frother allows you to prepare all your favorite espresso-based coffees. You can enjoy a barista-brewed latte, cappuccino or macchiato at home. Stainless steel appearance, stylish and durable, ideal for any size kitchen. This compact espresso coffee maker is perfect for home or office use
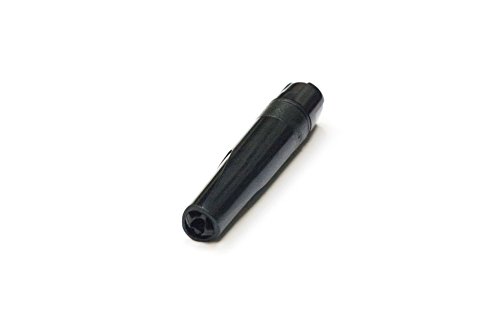
Replace broken milk frother part

Keep your espresso machine performing flawlessly with this steam wand cleaning needle. The sharp 304 STAINLESS STEEL NEEDLE easily pierces dried milk residue and blockages to restore pressure for perfect microfoam. The material makes it a durable espresso steam wand cleaning tool.
Purge & Wipe the Espresso Machine Steam Wand After Use
After you finish frothing milk, immediately wipe the steam wand with a damp cloth and then purge it for a few seconds. The damp cloth lifts milk film, preventing residue buildup that can harden quickly. Direct the wand over the drip tray, open the steam valve, and let steam flow for at least two seconds to clear the internal tube and tip. This quick purge is essential for steam wand hygiene and residue prevention, reducing clog risk. Keep a cleaning cloth handy for every milk drink, and repeat a brief purge during long steaming sessions to keep the tip clear. If the tip holes block, use a small needle or paper‑clip tool, then purge again to flush loosened milk. Consistent wipe‑and‑purge habits keep your wand performing optimally. Perform after every use to maintain wand hygiene. Using the proper temperature range helps prevent scalding and ensures silky foam. Regular descaling of the machine’s internal pathways prevents mineral buildup and maintains consistent steam pressure. Proper air injection ensures the foam stays velvety and stable.
Espresso Machine Maintenance: Descaling, Drip‑Tray Emptying, Filter Care
Keeping the steam wand clean is only half the battle; regular upkeep of the machine’s internals guarantees consistent espresso quality. Follow a Descaling schedule that matches your water hardness: once a year in soft water, every 3 months in hard‑water regions, or whenever the indicator flashes. First, empty the capsule container, drip tray, and waste bin. Mix ¾ water with ¼ descaling solution, place a large container under the outlet, and activate descaling mode by pressing the small‑cup and large‑cup buttons simultaneously until they flash. After the cycle, rinse the tank, run at least one full rinse, and exit the mode. Empty the drip tray daily, wash it with mild detergent, and dry before reinstalling. Perform Filter replacement after each descaling, ensuring the cartridge sits correctly and the tank float moves freely. Press both buttons simultaneously to start the descaling flow. Regular descaling prevents mineral buildup that can impair heating efficiency and flavor. Proper descaling also protects the pump pressure from clogging, extending the machine’s lifespan.

2-Pack Coffee Descaler and Cleaner - Clean and rinse away residue and oil buildup in your coffee maker with Impresa's Coffee Descaler Solution. Our highly effective solution comes with two 8-ounce bottles - enough for 4 descaling sessions (2 uses per bottle)

EXCEPTIONAL RESULTS: Introducing Tillbrook Coffee Machine Descaler specifically formulated for Breville—the best choice for removing hard water buildup, oils, and residue. It’s essential to clean and descale Breville Espresso Machines every 3-4 months to ensure proper functioning of your machine, to enhance the taste of coffee, and to extend the life of the machine.
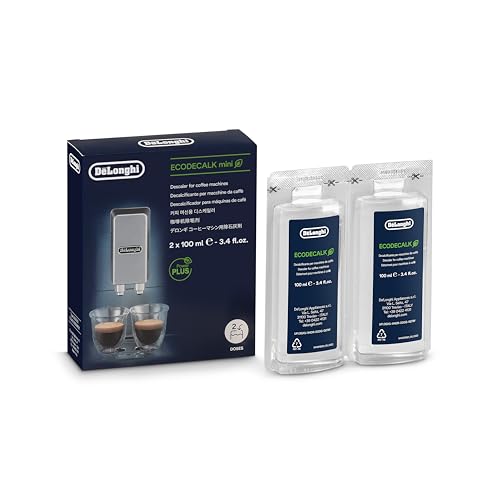
Eco-friendly universal descaling solution that's gentle on your coffee maker
Espresso Machine Troubleshooting: Weak Flow, Blockages, and Uneven Crema
If you notice weak flow, blockages, or uneven crema, start by checking for air in the water line and ensuring the reservoir is fully seated; a simple priming routine through the steam wand usually restores pressure and clears trapped air, while persistent low output after priming points to a blockage or faulty internal component that needs cleaning or replacement. Run the pump while directing water through the steam wand, then alternate to the brew path to push out any airlock. If sputtering continues, use a syringe to feed water into the main line while the pump runs. Inspect the nozzle and flow meter for scale or debris; clean or replace clogged parts. Check O‑rings and the distributor for leaks, as worn valves cause pressure loss and uneven crema. Perform these steps for effective crema troubleshooting. The distributor’s O‑ring and piston must be inspected for wear and cleanliness before reassembly. Properly disconnect the machine from power to avoid electrical hazards when cleaning. Regular descaling helps prevent mineral buildup that can cause these issues, and using filtered water can extend the time between cleanings.

FROM DE'LONGHI. The world-leader in espresso machines.

RESTORE COFFEE FLAVOR & AROMA: Our universal descaling solution removes bitter mineral buildup and calcium deposits from heating elements. This ensures your Keurig cleaner process restores the original "day one" taste of your favorite pods and espresso capsules

DESCALING SOLUTION: This professional grade cleaner will remove limescale and calcium buildup.