
Pick a 2‑ or 3‑cup Moka pot, fill the base with cold filtered water just below the safety valve, and load a ‑fine grind (about 11–12 g) into the basket without tamping. Screw the top on firmly, place the pot on a low‑to‑medium flame that matches the base size, and watch for a steady hissing that turns into a light sputter—when it does, pull the pot off the heat and give it a quick rinse to stop the steam. Stir the coffee in a pre‑warmed cup and enjoy; the next steps will show you how to perfect consistency and maintain your pot.
Pick the Right Moka Pot Size
When you choose a moka pot, match its “cup” rating to the amount you actually drink. A “cup” in moka terms means 40–60 ml, so a 1‑cup pot yields about 40 ml, a 2‑cup about 80 ml, and a 6‑cup roughly 240 ml. For a single serving, a 2‑cup or 3‑cup pot balances convenience and volume; a 3‑cup can produce an 8–12 oz drink or split into two 6–7 oz cups. If you regularly share, a 4‑cup pot serves two 8–10 oz drinks, while a 6‑cup covers larger or multiple servings. Stick to the rated brewing volume and fill the basket with the corresponding coffee dose (e.g., 11–12 g for 2‑cup). Size selection should reflect your typical consumption, avoiding under‑or over‑filling that harms extraction. A full basket ensures proper extraction and strength. Understanding the stovetop brewing physics helps you appreciate why pressure builds in the pot. Properly sealing the pot’s lid prevents steam leaks, which could otherwise reduce the brew pressure needed for a rich crema. The typical brew time for most moka pots is between 4 and 6 minutes from start‑up to the moment the coffee begins to flow, a brew time that can be fine‑tuned by adjusting heat, grind size, and water amount.

Mini Express is the ultimate combination of creativity and innovation, delivering a perfect italian espresso directly in the cups

Moka Induction is the first Moka suitable for use on induction cooktops, with an aluminum upper part, the same material as the classic Moka Express, combined with a Stainless Steel boiler
Gather the Coffee and Water You’ll Need
Which water you choose and how you measure it set the foundation for a great moka‑pot brew. Use fresh, cold water and filter it to remove chlorine or excess minerals; a good filtration method improves flavor clarity and brewing consistency. Fill the lower chamber just below the safety‑valve line, aiming for about 65–70 % of the final cup yield. Weigh the water for repeatable results, then match the coffee ratio to the basket capacity—typically a level, loose fill without tamping. Keep the gasket, funnel, and basket clean, and pre‑heat the water if you prefer a quicker brew. Consistently using the same water source and measuring technique guarantees each pot replicates the desired taste. Regular descaling prevents mineral buildup that can alter water flow and affect extraction, ensuring the optimal brewing temperature remains stable over time. Proper descaling also helps maintain the consistent pressure needed for optimal extraction. Follow the machine’s safety procedures when disassembling to avoid damage or injury.
Grind Coffee to a Medium‑Fine Consistency
If you aim for a balanced brew, start with a medium‑fine grind that feels like fine sand or table salt; this texture offers enough resistance for the moka pot’s steam pressure without choking the filter, allowing steady water flow and even extraction. Choose a burr grinder for uniform particle size; the grind texture should be consistent, not chunky, to support extraction balance. Adjust the setting until grounds clump slightly in a pinch test, avoiding powdery or muddy feels. Observe the brew: a rapid sputter signals a grind too coarse, while a sluggish flow indicates it’s too fine. Fine‑tune in small increments—coarser for bitterness, finer for sourness—to maintain steady pressure and optimal flavor. Freshly ground beans yield the most predictable results. Consistent particle size ensures even extraction across the brew. Understanding the relationship between grind size and extraction rate helps you dial in the perfect flavor profile for each brew method. A well‑designed burr grinder can grind size uniformity across all settings. Proper tamping pressure further stabilizes the puck, reducing channeling and promoting uniform extraction.
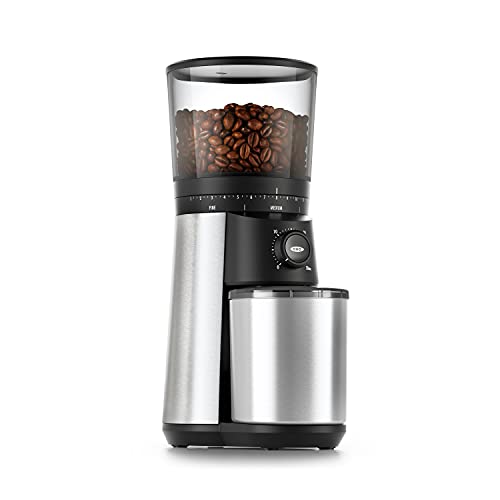
40mm stainless steel conical burrs: Precision grinding system produces uniform coffee grounds to ensure even extraction for rich, balanced flavor in every cup.
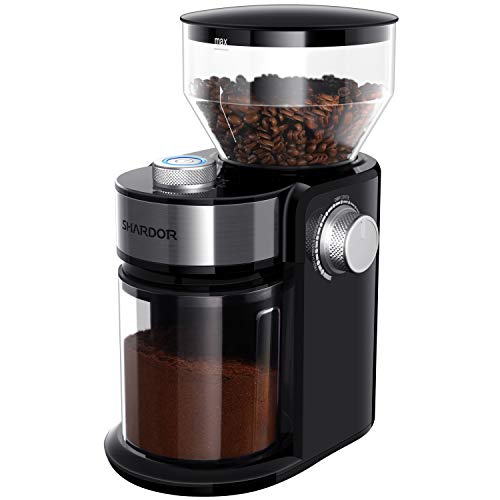
[ UNIFORM BURR GRINDING ] Premium metallic flat burr mill ensures consistent, uniform grounds without burning beans. Perfectly preserves rich coffee aroma for pour-over, drip, and cold brew.

Supercharging Performance & Long-Lasting Battery – Equipped with a high-capacity 2000mAh battery that delivers 33% more runtime than the previous generation. The upgraded motor grinds coffee beans 1.8 times faster, ensuring rapid and efficient operation with every use
Fill the Base Up to the Safety Valve
Because the safety valve sets the upper limit for the water chamber, you should pour cold water into the base until the level sits just below the valve’s lower edge. The valve material, usually brass or stainless steel, tolerates pressure but not excess liquid; overfilling eliminates the air pocket needed for proper pressure buildup. Fill the lower chamber with cold water—never boiling—to keep temperature gradients gentle and avoid rapid pressure spikes that cause bitter, burnt coffee. After adding water, visually confirm the line is just under the valve, then wipe the rim clean before screwing the top on. This precise fill creates a consistent air gap, supports balanced extraction, and prevents the “boiled coffee” taste that results from water above the valve. Regular descaling maintains optimal pressure performance and prevents residue buildup. Proper water hardness management reduces mineral scale formation. Quick heating ensures the machine reaches brewing temperature faster.

CRAFT COFFEE AT HOME: Produces six demitasse/espresso servings of rich, smooth espresso coffee in minutes. Craft your own espresso, Americano, Cuban coffee, Italian-style coffee, Moka, lattes, cappuccinos and more from the convenience of your home.Filter type:Reusable

Moka Espresso Coffee: Stovetop espresso maker, Moka pot, & manual coffee percolator machine. Available in 3-cup, 6-cup, 9-cup and 12-cup sizes. The stove top percolator makes home espresso like a barista. It's easier to use than an electric espresso machine and makes a rich cup of espresso mocha.3 cup, 6-cup, 9-cup and 12-cup expresso coffee pot, stove top size, food grade aluminum Espresso Moka coffee pot.
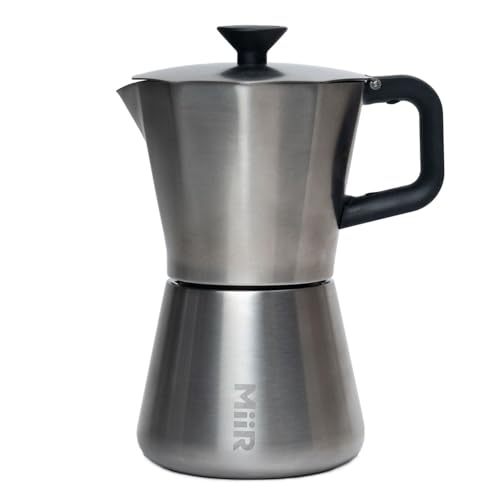
Effortless Espresso at Home - Our MiiR New Standard Moka Pot Espresso Maker brews a rich, flavorful 10oz cup in just five minutes, making it the perfect coffee maker for all espresso lovers
Load the Filter Basket Without Tamping
Even before you lock the portafilter, make sure the filter basket matches the shot size you intend, is clean, and sits securely in its spring. Choose a single or double basket according to your dose—6–7 g for single, 12–14 g for double. Brush out any residue; basket cleaning prevents channeling and aids pressure control. Loosely pour grounds until they mound slightly above the rim, then level with a finger, moving side‑to‑side to break clumps and distribute evenly. Avoid compressing; the coffee should stay fluffy. Brush or blow loose grounds from the rim before insertion, ensuring a clean edge for a tight seal. This gentle loading yields a uniform bed, promotes steady pressure, and readies the portafilter for the next step. Avoid water drips before inserting the portafilter to prevent extraction issues. Using a tight‑seal technique helps maintain consistent pressure during extraction. Applying a consistent 30‑35 psi tamp pressure ensures even extraction and reduces channeling. Maintaining a consistent tamp pressure helps stabilize flow rate and improves flavor balance.
Assemble the Pot Tight for a Secure Seal
Before you set the pot on the stove, twist the top and bottom sections together until the threads engage fully and the gasket sits snugly. First, wipe the funnel rim and mating edges to remove any coffee grounds. Check that the gasket and filter are correctly seated; a quick gasket cleaning removes debris that could compromise the seal. Align the threads carefully—proper thread alignment prevents cross‑threading and guarantees even pressure. Turn the pot by hand, using firm pressure but never the handle, until you feel resistance. A hand‑tightened, semi‑firm closure is ideal; overtightening can stress joints. Verify that the assembly feels solid and that no gaps remain before you move to heating. Ensure the safety valve remains unobstructed to avoid pressure buildup. Using the correct grind size helps achieve optimal extraction and prevents clogging. Periodically rinse the gasket with warm water to prevent coffee residue buildup.
Apply Low‑to‑Medium Heat and Position the Flame Correctly
When you set the moka pot on the stove, keep the flame low‑to‑medium and make certain it stays directly under the base; this prevents the handle and sides from overheating, guarantees a steady temperature rise, and avoids a rapid, bitter extraction. Choose a burner that matches the pot’s diameter; proper flame sizing keeps the fire from licking up the sides and protects the gasket. Start with gentle heat, especially if you pre‑heat water, to let pressure build slowly and maintain a thin, steady stream. As coffee begins to rise, reduce the flame slightly to preserve heat control and prevent a forceful gush. Center the pot, avoid side exposure, and watch for any signs of overheating to keep flavor clean and equipment safe. Use a burr grinder for optimal extraction and consistency. Proper water temperature is essential for balanced espresso, as it influences solubility and the overall flavor profile. Selecting a device with accurate pressure control helps achieve consistent extraction results.

MEDIUM CAPACITY: This stovetop espresso maker brews six cups of rich, full-bodied coffee using traditional Italian moka pot brewing method, forcing hot water through grounds for barista-quality espresso flavor in minutes

Venus is the perfect combination of tradition and innovation: the original induction coffee maker that prepares a perfect coffee, with a Made in Italy taste from a pot with a unique design.
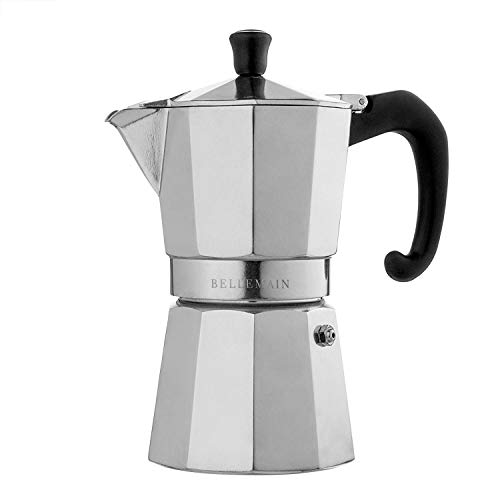
BELLEMAIN: THE ARTISANAL, MADE TOUGH: Gift yourself a richer, more intoxicatingly delicious mocha espresso every day, with Bellemain’s flagship espresso maker. Engineered to heat up quicker and more evenly, your delectable pick-me-up will be warming your hands faster than ever.
Moka Pot Audible Cues: When the Brew Is Done
Ever notice how the hissing and gurgling from your moka pot signals the brew’s end? You’ll hear a smooth flow turn into a light bubbling or crackling as the boiler runs low on water. That brief hiss, followed by a sputtering stream with more air than coffee, marks the moment to stop. The coffee will look pale, and the pot will start producing more steam than liquid. This auditory cue is more reliable than a timer because it adapts to pot size and heat. When you hear the first clear sputter, remove the pot immediately; otherwise, the extraction continues, leading to a bitter finish. Keep the lid open, listen, and you’ll preserve the brew’s sweetness. Fine grind ensures optimal extraction speed and flavor balance. Using the correct water‑to‑coffee ratio helps prevent over‑extraction and maintains a rich crema.
Remove the Pot at the Right Moment to Avoid Over‑Extraction
The moment the hissing turns into a rapid sputter, you should pull the pot off the burner. That clear gurgle signals the brew is almost done, so you act with precise timing to keep flavor control intact. Immediately remove the pot and, if you like, rinse the base under cold tap water to halt extraction instantly. Cooling stops the steam‑driven sputtering phase that would otherwise push bitter compounds into the cup. Avoid letting pressure rise further; a steady‑pressure brew yields a cleaner profile. Keep the heat medium‑low and watch the lid, so you can intervene before steam dominates the flow. This short, controlled finish preserves a smooth, balanced espresso.
Serve, Stir, and Clean for Consistently Great Coffee
Precision matters the moment you finish brewing; you should transfer the moka coffee straight into a prewarmed cup, stir briefly to blend the stronger first draw with the lighter later portion, then pour carefully to preserve temperature and crema. A quick, gentle stir guarantees even aroma retention and avoids stratification, while an ideal pour keeps the crema intact and maintains consistent temperature across cups. After serving, disassemble the pot once it’s safe to handle, rinse all chambers with warm water, and dry thoroughly for quick cleaning. Inspect the seal and gasket for cracks or residue; replace worn parts to guarantee pressure stability. Regular seal inspection and thorough drying prevent flavor loss, corrosion, and uneven extraction, delivering consistently great coffee every time. The moka pot has been a staple in Italian households for over 80 years and remains a symbol of hospitality.


