
You’re right to wonder if coconut milk can foam like dairy; it can, but you need a full‑fat, barista‑style blend and a steady hand. Heat it to 140‑150 °F (60‑65 °C) and use a steam wand or a good handheld frother—keep the tip just below the surface so you inject tiny bubbles, not a lot of air. Add a pinch of guar or a splash of coconut cream for stability, then let the foam rest 30 seconds before pouring; you’ll get café‑quality micro‑foam and a next next step for learning more tricks.
Yes, Coconut Milk Can Be Frothed – Quick Answer
Can you actually froth coconut milk? Obviously you’re wondering if that creamy, nutty alternative can hold a latte‑worthy foam. Here’s the thing: coconut milk froths just fine, especially the fuller‑bodied varieties that have higher fat. Heat it to 140–150 °F (60–65 °C) and use a handheld frother, steam wand, or French press. Mix it well before heating, then give it a quick 30‑second shake or a short burst of frothing; you’ll see micro‑foam form, perfect for coffee or flavor pairings like cinnamon or cocoa. Use a pointed‑tip jug for sharper latte‑art lines. Overheating above 150 °F weakens the foam, and over‑frothing makes it too thick. Let the foam rest 30 seconds before pouring for a smooth texture. Takeaway: coconut milk can deliver a silky foam when you control temperature and mixing. Ready to try a specific frothing method? The protein‑stabilized structure of almond‑style milk helps maintain foam integrity. Understanding the underlying air‑injection mechanism can help you achieve consistent foam across different milk alternatives. The high‑protein variety of oat milk often yields a more stable foam due to its increased protein content.
Choosing the Best Coconut Milk for Foam
If you’re wondering why some coconut milks foam like a barista and others just flop, you’ve hit the right spot.
What makes a “Barista branding” blend work?
Barista‑style cartons contain gellan gum or soy lecithin, which lock bubbles in place. They also add protein, giving a microfoam that holds shape for latte art. Look for labels that say “barista blend” or “espresso edition.”
How does fat affect foam?
Full‑fat coconut cream‑based milk creates richer foam, but too much fat makes it collapse quickly. A 5‑%‑to‑7 % fat range usually balances body and stability.
Why care about Shelf‑life testing?
Fresh cartons perform best; near‑expiry milk separates, reducing uniformity. Shake or blend before frothing, and refrigerate after opening.
Takeaway: Choose a barista‑branded, full‑fat, shelf‑life‑tested carton, shake it, then steam. Next, ask yourself what temperature will give you the perfect foam. Adding a quick shaking step before heating can further improve foam consistency. Using a paper towel as a temporary filter can help catch any stray particles before frothing. Regularly descale the machine to prevent mineral buildup that can affect frothing performance.
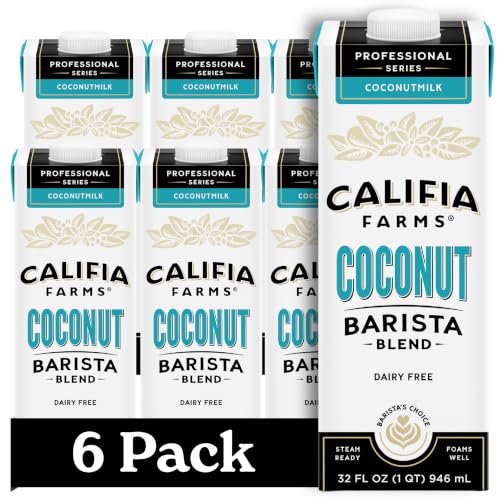
FROTH + STEAM PERFECT LATTES: With Coconut Barista Blend, you can froth and steam perfect dairy-free lattes at home. With its creamy coconutty taste, this rich barista blend is made for lattes.

FROTH + STEAM PERFECT LATTES: With Coconut Barista Blend, you can froth and steam perfect dairy-free lattes at home. With its creamy coconutty taste, this rich barista blend is made for lattes.

DAIRY-FREE COCONUT MILK ALTERNATIVE – A rich, creamy coconut milk that works well as a dairy substitute in coffee, baking, sauces, soups, and everyday recipes.
Why 140‑150 °F Is the Ideal Frothing Temperature
You’re probably wondering why barista‑style milks don’t need a rolling boil to get that silky foam. Here’s the thing: temperature science shows that coconut milk’s proteins and stabilizers hit their sweet spot between 140 °F and 150 °F. At 140 °F the liquid warms enough to let air weave through, creating a smooth, velvety foam texture without breaking the structure. By 145 °F you usually see the best balance of volume and stability, and you avoid the stiff, unstable foam that appears when you push past 160 °F.
Now, think of it like heating water for tea—just enough to release flavor, not a boil that burns the leaves. When you heat coconut milk gradually into that 140‑150 °F band, the fat and protein matrix stays intact, letting micro‑bubbles form that give you a creamy pour and a latte‑art‑ready surface. Overheating past 170 °F starts to degrade those proteins, causing separation and a loss of smoothness, so you’ll end up with a watery, flat foam.
All right, the takeaway: keep your coconut milk in the 140‑150 °F window, heat gently, and you’ll consistently get a rich, stable foam texture. Next, you might wonder which frothing tool works best for hitting that temperature—hand‑held versus steam wand. Foam stability is also influenced by the type of frother you use. Using a French press can achieve comparable foam when the milk is heated to the optimal temperature.
Hand‑Held Frothers vs. Steam Wands: Which Works Better?
Which frothing tool gives you the best coconut‑milk foam? You’re probably wondering which device wins the equipment comparison. Here’s the thing: a steam wand injects pressurized steam, heating and aerating simultaneously, so you get a dense, velvety microfoam that blends seamlessly into espresso. The foam texture is smoother and finer, ideal for latte art.
All right, a handheld frother is compact, battery‑powered, and cheap. It agitates the milk, creating a light, airy foam that sits on top. The texture is bubblier, perfect for casual drinks where volume matters more than precision.
Obviously, if you crave café‑style texture, go with the steam wand; if you need speed and portability, the handheld frother wins. Your next step: try both with your favorite coconut milk and see which foam texture you prefer. For best results, pre‑chill the frother before use to enhance foam stability. Also, aim for a milk temperature of about 140 °F to achieve optimal micro‑foam consistency. Regularly cleaning the machine’s steam wand as part of a weekly maintenance routine helps prevent milk residue buildup.

Rancilio Silvia (V1/V2) Steam Wand

Complete Steam Wand Assembly: Compatible replacement for Breville espresso machine part SP0001568.

Double Layer Insulation: Features double layer vacuum insulation to block heat transfer. The outer tube stays cool to the touch during steaming, preventing burns. Enjoy safer operation while focusing on your latte art without the risk of scalding your hands
Stabilizers & Add‑Ins That Keep Coconut Foam Stable
Stabilizers and add‑ins are the secret sauce that keeps your coconut foam from collapsing a minute. You’re probably wondering why some foams hold while others deflate instantly. The answer lies in gumum texture, flavor pairing, and a few smart add‑ins.
Which gums work best?
Guar, locust bean, and carrageenan thicken the liquid, letting bubbles stay trapped. Xanthan works at 0.1–0.2 g per 100 mL, but too much makes the foam slimy. If you buy pre‑stabilized milk, you may skip extra gum.
How do proteins help?
Egg white (about one per half‑pint siphon) forms a protein film that locks air in. Coconut globulin teams up with coffee polyphenols, thickening the interfacial layer for a richer, longer‑lasting foam.
What about fat and powders?
Use the thick cream layer from refrigerated milk or full‑fat coconut milk for body. Adding a pinch of ube powder or yam starch boosts viscosity and adds a subtle flavor pairing without clumping.
Takeaway: Combine a tiny dose of xanthan or a commercial gum with a protein boost and a fat‑rich base, then sprinkle in a dry powder for texture and taste. Now you have a stable, silky foam ready for your latte. What will you try first? For the most consistent results, follow the optimal coffee‑to‑water ratio used in AeroPress brewing. A consistent grind from a burr grinder ensures uniform extraction, which also helps the foam stay stable longer. The high‑pressure pump in a Nespresso machine creates the rapid flow needed to emulsify fats and stabilize foam.
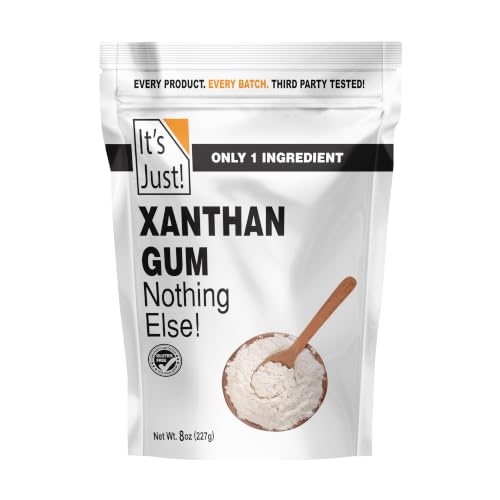
It's Just - Xanthan Gum, 8oz, Batch Tested Gluten Free, Keto Baking, Non-GMO, Thickener for Sauces, Soups, Dressings, Packaged in USA

100% PURE & NATURAL XANTHAN GUM FOR BAKING KETO - Kate Naturals' Xanthan Gum Powder is natural and gluten free. Xantham gum is a great food thickener and is a gluten free baking powder.

PURE POWDER: Xanthan gum is actually a widely-used thickening agent, and xanthan is legendary for its ability to increase liquid viscosity with just a tiny amount and is stable throughout a wide range of temperatures and pH
Common Coconut‑Milk Frothing Mistakes and Fixes
All right, you’re probably wondering why your coconut milk sometimes collapses the minute you finish steaming.
Why does over‑aeration ruin foam?
You push the wand too high, hear a loud hiss, and dump excess air in. Big bubbles form, then the foam deflates fast. Lower the tip, keep it just below the surface, and listen for a gentle sigh. Swirl to break large bubbles, and you’ll get silky micro‑foam.
How does temperature‑control matter?
Coconut milk loses stability past 125 °F (52 °C). Overheating makes it bitter and thin. Aim for 115‑130 °F, stop before it steams.
A thermometer helps you stay in the sweet spot.
What if the milk separates?
Canned milk often splits; shake or stir it well before steaming. Poor‑quality, diluted milk creates weak foam that collapses. Choose fresh, full‑fat milk and give it a good mix.
Takeaway: Keep the wand low, watch the thermometer, and start with well‑mixed, fresh coconut milk. Ready to try a smoother latte? Use full steam pressure for consistent hissing and better foam texture. Adding a steam wand can enhance control over foam consistency.
Clean the mesh filter after each use to prevent residue buildup.
A proper coffee‑to‑water ratio ensures the brew stays smooth and low‑acid, just like a well‑balanced cold brew.
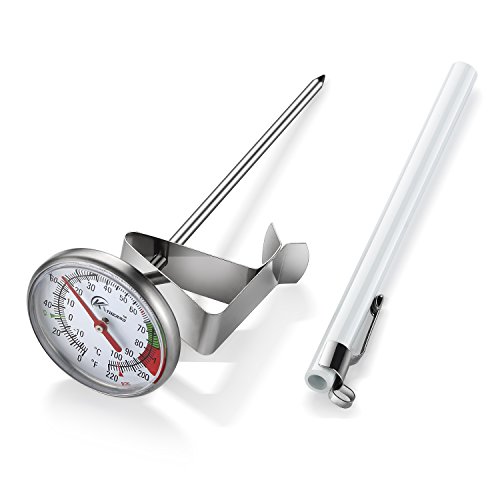
DESIGN:Multi-stage design of the fixed clip, adjust the thermometer read the location of the disk surface to facilitate observation of the temperature of the bubble.
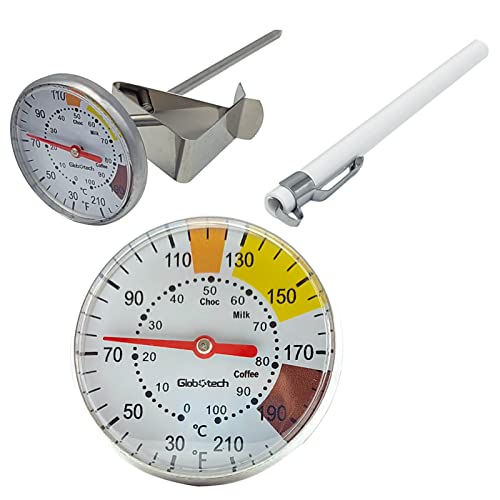
MILK FROTHING THERMOMETER – This stainless-steel thermometer is designed for milk frothing, steaming and making cappuccino, measure the temperature of milk, chocolate and coffee. A professional Barista tool to ensure every milk frothing a success. You can enjoy your cappuccino, latte art at home with it as well.

From Latte to Cold‑Foam: Simple Coconut‑Milk Coffee Recipes
If you’re wondering why a hot coconut‑milk latte feels different from an iced version, you’re not alone.
How do I make a global milk latte?
Brew 8 oz of strong coffee or pull a coconut espresso shot. Warm ½ cup full‑fat coconut milk to 145 °F, add vanilla, then froth with a handheld wand until light. Pour coffee first, then the milk, and spoon foam on top. Let it rest 30 seconds for texture.
What’s the trick for cold‑foam?
Chill the same milk, shake it in a mason jar for 45 seconds, or pulse a frother briefly. Top an iced coffee or cold brew with this airy foam.
Takeaway
Hot and cold versions share the same base; temperature and frothing method create distinct textures. Try both and decide which you prefer.

CREAMY VELVETY FROTH IN SECONDS: Making coffee-shop-style recipes at home is as simple as it can be with this milk frother. The 13,000 RPM motor and 25 spiral rings on the frother let you whip up rich foam in no time. Level up your day with this frother for protein powder, warm or cold coffee, latte, cappuccino, hot chocolate, matcha, and powdered drinks.

NO MORE BATTERIES -- USB Rechargeable. Forget buying batteries! Just plug in the included USB cable to charge. One charge lasts for months, making it eco-friendly and always ready to use.

POWERFUL FROTHING EXPERIENCE: Skip the coffee shop run and enjoy lattes, cappuccinos, matcha, hot chocolate, powdered drinks, or iced coffee at home with this milk frother. With a 13,000 RPM motor and 26 spiral rings, this coffee foam maker turns ordinary milk to frothy perfection in seconds. The cup blender wand makes your frothing experience unlike any other.
Tips for Consistent, Café‑Quality Coconut Milk Foam
How do you get café‑quality coconut milk foam every time? You’re probably wondering why your foam collapses or feels rubbery. The secret lies in milk choice, temperature, and aeration technique.
Which milk works best? Use a barista‑blend or extra‑creamy coconut milk with 4‑5 % fat, chilled before frothing. Full‑fat milk gives denser foam, while low‑fat versions stay thin. If you have coconut cream, chill a can and pour a small amount for cold foam.
What temperature should you aim for? Keep the frothing range at 140‑150 °F (60‑65 °C). Overheating past 150 °F separates fat and ruins foam texture. A thermometer helps you stay in the sweet spot.
How do you control aeration? Position the steam wand tip just below the surface and use moderate steaming speed. Slightly more air than dairy milk creates micro‑foam, but too much makes thick, tough foam. Swirl gently after steaming to merge bubbles and achieve a glossy, smooth foam texture.
What equipment tips help? Purge the wand, use a narrow pitcher, and swirl before pouring. Consistent volume, temperature, and time give repeatable results.
Takeaway: Chill a high‑fat coconut milk, steam at 140‑150 °F with moderate speed, and swirl for glossy foam. Ready to try a latte? Grab your wand and give it a go.
Steamed milk creates a velvety micro‑foam that enhances flavor and texture in lattes and cappuccinos. Regularly cleaning the steam wand prevents mineral buildup and ensures consistent frothing performance. Properly pre‑rinsing the wand removes residual coffee oils that can affect foam quality.