
Start with a uniform, coarse grind (about 800‑1400 µm) and a 1:12 coffee‑to‑water ratio, then seat the filter basket correctly and lock the lid. Pour cold, filtered water in two stages—20 % first, stir, then add the rest—ensuring all grounds are fully saturated. Let it steep 16‑20 hours at 40‑45 °F, then filter through a pre‑wet paper filter into a sealed jar. Dilute the concentrate to taste, store it in the fridge, and you’ll uncover more tips ahead.
Choose the Right Grind Size and Coffee‑to‑Water Ratio for Cold Brew Coffee
When you pick a grind for cold brew, aim for a coarse, filter‑like texture—think sand or kosher‑salt size—so the grounds stay even and sediment stays out of the final cup. Use a burr grinder to achieve grind consistency; a uniform particle size between 800 µm and 1 440 µm prevents over‑extraction and keeps the brew clean. Next, apply ratio scaling to match your desired strength. A 1:12 coffee‑to‑water weight ratio (≈83 g per litre) yields a ready‑to‑drink brew, while 1:8 (≈125 g per litre) creates a concentrate you can dilute later. For a very strong base, use 1:4 (≈250 g per litre). Adjust both grind and ratio together for optimal flavor and minimal sediment. The steeping time of 12–24 hours allows the coffee to fully extract its flavors. cold brew can be stored in the refrigerator for up to a week without losing its smoothness. The low‑acid profile of cold brew makes it easier on the stomach compared to hot‑brewed coffee.
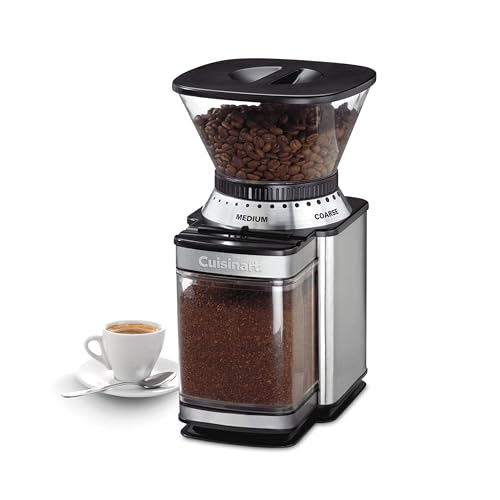
ENJOY OPTIMUM FLAVOR: The Cuisinart Coffee Grinder with 18-position slide-dial grind selector provides a uniform grind from ultra-fine to extra-coarse to ensure your fresh coffee beans are ground exactly the way you prefer.
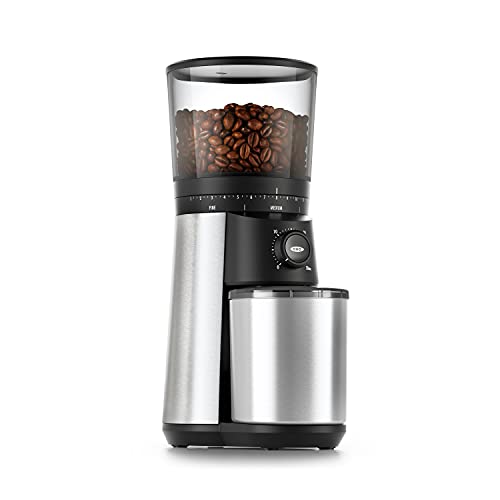
40mm stainless steel conical burrs: Precision grinding system produces uniform coffee grounds to ensure even extraction for rich, balanced flavor in every cup.

[Consistent Flavor Extraction]: Choose the coarseness you need from the 28 settings on the Lonkion burr coffee grinder. The flat metal burr grinding head ensures an even and consistent grind. Whether you need a fine grind for espresso or a coarser grind for French press coffee, you can adjust the grind size for any coffee type.
Assemble the Filter, Basket, and Lid Correctly Before Brewing
If you seat the filter basket correctly before adding water, you’ll avoid leaks and keep grounds contained. First, identify the brewing carafe, the filter or infuser basket, and the lid. Check the filter design—mesh, wrap‑around, or paper—and confirm it matches the basket’s holder. Slide the basket into the carafe, making sure any gasket or rubber seal sits snugly between them; a tight seal guarantees material durability and prevents drips. Lock the basket if the model requires a click‑in mechanism, then place the lid or cap. Screw or press it on until it sits flush, with no wobble or cross‑threading. Verify that the assembly is upright, centered, and sealed before you begin steeping. Cold brew continues extracting flavor during refrigeration, so optimal storage is essential for maintaining taste. Regularly cleaning the press after each use prevents residual oils from affecting flavor. Using cold brew concentrate in iced or hot specialty drinks can quickly elevate your coffee routine.
Pour Cold Water and Fully Saturate the Grounds
Now that the filter basket is sealed, pour cold, filtered water directly over the grounds, aiming for an even distribution that wets every particle. Use a 1:8 coffee‑to‑water ratio, or a 1:4 concentrate if you plan to dilute later, and guarantee the water comes from a reliable filtration method to support water taste profiling. Begin with a staged pour: add roughly 20 % of the water, pause, then gently stir with a wooden spoon to eliminate dry pockets. Continue adding the remaining water, maintaining a steady flow that keeps the grounds fully submerged. Verify that the surface is uniformly wet before closing the brewer; any dry spots will cause uneven extraction and weaken the final flavor. This thorough saturation sets the foundation for a balanced, smooth cold brew. For optimal flavor, consider using a coarse grind to prevent over‑extraction. Regularly descale the machine to avoid mineral buildup that can impair water flow and affect taste. Maintaining a consistent water temperature helps preserve delicate flavor compounds during extraction.
Set the Optimal Brew Time and Temperature for Cold Brew Coffee
Because cold‑brew extraction hinges on time and temperature, you’ll want to aim for a steep of 16–20 hours at a cool temperature (ideally 40–45 °F in the refrigerator) to hit the flavor sweet spot without risking bitterness. Set your brewack temperature in the fridge and lock the lid tightly; this stabilizes extraction timing and prevents heat spikes. Monitor the clock: a 16‑hour mark gives a bright flavor balance, while 18–20 hours deepens body without over‑extracting. If you prefer a slightly quicker brew, keep the container at ambient 60–75 °F, but expect a shift toward acidity and less brew consistency. Record the start time, then taste at 16 hours; adjust up to 20 hours if the balance feels thin, never exceeding 24 hours to avoid bitterness. The convenience of pod‑based systems can be compared to the richer control of manual espresso makers, and many users find the cost trade‑off worth it for the flexibility. Using a higher coffee‑to‑water ratio, such as 1:4, creates a strong cold brew concentrate that can be diluted later for a smoother, low‑acid cup. For a balanced cup, consider the 1:15 coffee‑to‑water ratio used in Aeropress brewing, which ensures consistent extraction even at lower temperatures.

Effortless Café-Quality Brews: The Takeya Deluxe Cold Brew Coffee Maker delivers smooth, less acidic coffee at home. Its fine-mesh filter keeps grounds out, ensuring rich, clean coffee from any bean, making your kitchen feel like a personal café.

【⚠️ Important Usage Warning】: Do not pour boiling water directly into the container; the maximum safe operating temperature is 60°C (140°F). Avoid drastic sudden temperature shifts to stop cracking damage.

[Easy to Clean]: 64oz cold brew coffee maker is of premium food grade material. Lead and BPA free. Historic Mason jar design cleans without dead space and is safer to use
Filter Out the Grounds to Separate the Concentrate
After you’ve set the brew time and temperature, it’s time to separate the liquid concentrate from the grounds. Place a fine‑mesh sieve over a pitcher and pour the cold brew through it; the sieve’s filter material catches the bulk of grounds while maintaining a steady flow rate. Pre‑wet a coffee‑filter paper or a cloth filter, then set it in a second bowl or carafe. Slowly pour the strained liquid through this second filter; the pre‑wetting reduces paper taste, speeds flow, and traps fine sediment. If the drip slows, gently stir the slurry to break clumps and restore flow. Transfer the clear concentrate immediately to a sealed jar, compost the spent grounds, and keep the jar refrigerated. The coffee grounds should be coarsely ground for optimal extraction. The Chemex’s thick paper filter yields a clean, bright cup, illustrating how filtration choice influences flavor clarity. For best results, give the glass vessel a quick soft brush rinse before assembling the filter. Using a French press can also create a richer foam on top of the concentrate, mimicking the texture of a latte.
Dilute the Concentrate or Brew a Ready‑to‑Drink Batch
How much of the concentrate should you add to achieve your ideal strength? Start with a 1:2 ratio—one part concentrate to two parts cold water, milk, or ice—then taste and adjust. If you prefer a lighter cup, move to 1:3; for a bold brew, try 1:1. Use a measuring cup or kitchen scale for accuracy, stir gently, and note that ice counts as extra dilution as it melts. Pair the diluted brew with complementary flavors such as citrus or vanilla, but keep equipment cleaning in mind: rinse the pitcher and stirrer promptly to prevent residue buildup. For a ready‑to‑drink batch, brew at a 1:8 coffee‑to‑water ratio and serve straight, skipping dilution entirely. Choosing the right tool can enhance texture, and a milk frother can create light, airy foam for a smoother finish. Proper pre‑chilling of the frother helps achieve consistent foam stability.
Store Cold Brew Safely and Keep It Fresh
If you want your cold brew to stay vibrant and safe, refrigerate it immediately after brewing and keep it at 41 °F (5 °C) or lower—ideally 34‑40 °F (1‑4 °C) in the back of the fridge. Transfer the concentrate into airtight containers; glass mason jars with tight‑fitting lids work best because they block oxygen and don’t retain flavors. Fill each jar near the rim to minimize headspace, then seal securely. Store undiluted brew for up to a week; once you add milk or sweetener, consume within two to three days. For longer life, use freezing tips: pour small batches into ice‑cube trays, freeze, then transfer cubes to airtight bags. Thaw cubes as needed for fresh, ready‑to‑drink coffee. Adjust the coffee‑to‑water ratio to 1 g per 15 g for optimal flavor balance. Proper grind size ensures consistent extraction and a smoother taste. Remember that using a paper filter can enhance clarity and reduce sediment in your cold brew.
Troubleshoot Weak Flavor, Over‑Extraction, and Leakage
When your cold brew tastes weak, turns bitter, or drips from the tap, the issue usually lies in grind size, coffee dose, steep time, or seal placement. First, run a sealune check: guarantee the seal lies flat, centered, and wrinkle‑free. Mis‑aligned seal causes leakage and can let air in, altering extraction. If flavor is thin, coarsen the grind or increase the coffee dose to at least 250 g. For bitterness, grind finer or shorten the steep to 12 hours, staying within the 12‑24‑hour window. Verify seal alignment during reassembly; a properly centered seal should protrude evenly on both sides. Clean all parts to remove oil or residue, then retest before adjusting brew parameters. A shorter steep can reduce bitterness while preserving body. Using a consistent burr grind helps maintain uniform particle size for reliable extraction.

Durable Cold Brew Pitcher: Crafted from thick, high-quality, food-grade soda-lime glass, this cold brew coffee maker is built for long-lasting durability. Unlike plastic, it’s BPA-free, lead-free, and free from harmful chemicals, ensuring your drinks stay fresh and free of unpleasant odors. With its sturdy construction, this pitcher is perfect for daily use. Trusted by over 150,000 coffee lovers, the Mason jar design makes it ideal for storing and pouring cold brew coffee, iced tea, and more

Heavy Duty Glass Pitcher: Crafted from high-quality, food-grade soda-lime glass with a thickness of 4.15mm, this heavy-duty pitcher feels solid and well-balanced in hand. Break-resistant and built to last, it preserves the taste of your drinks better than plastic. Perfect for cold brews, iced teas, juices, and more, this pitcher’s compact design fits easily in most fridge doors. Trusted by over 300,000 coffee enthusiasts, JunVpic Cold Brew Coffee Maker is the perfect addition to your kitchen.

【Premium Cold Brew Kit】: Our kit comprises a 64-ounce cold brew pitcher equipped with a convenient pour spout lid, a high-quality stainless steel filter, and a cleaning brush. It should be noted that the glass is not suitable for extreme temperature changes; boiling water must not be added. Ideal for the home office, our cold brew coffee pitcher enables you to relish delicious and refreshing coffee without having to leave the comfort of your home workspace.
Experiment With Flavors, Beans, and Batch‑Size Scaling
Ever wondered which bean, roast, or batch size will give you the flavor you crave? Start by picking bean origins that match your taste goal: darker, natural‑processed beans give a smooth, sweet base, while light roasts highlight floral notes if you brew hot‑over‑ice. Use a coarse grind and a 12‑hour steep, then filter through a mesh or Aeropress for clarity. Keep the coffee‑to‑water ratio constant—1 part coffee to 3 parts water—whether you make 1 cup or 5 cups. After brewing, experiment with flavor add‑ins: dilute 1:1 with milk for body, or add syrups to a filtered concentrate for sweetness. Record acidity, fruitiness, and body to compare how each origin and batch size scales. Use a 250 µm grind to balance extraction efficiency and brew strength.

One 10 oz bag of Gevalia Guatemalan Single Origin Special Reserve Coarse Ground Coffee
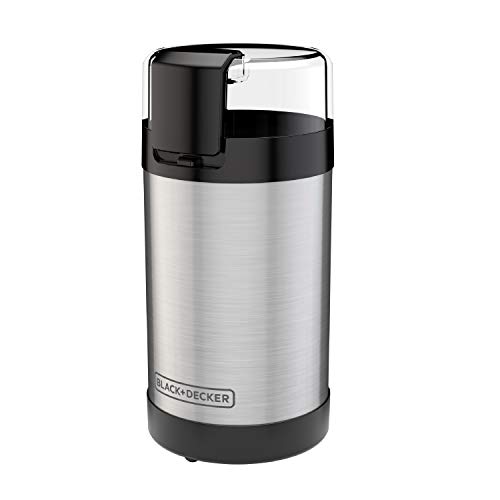
STAINLESS STEEL BLADES AND BOWL - The sharp blades and durable grinding bowl are built to last, delivering uniform grinds with every use

40 EXTERNAL ADJUSTABLE GRIND SETTINGS - Unlike traditional grinders with internal adjustments, our manual coffee grinder offers 40 precise external settings. The easy-to-use adjustment ring lets you select your perfect grind level, broadening your coffee flavor options without the mess of stray grounds. Perfect for espresso, pour-over, French press, and more.