
You’re probably wondering why your Moka‑pot coffee sometimes ends up weak or bitter, and you’re right to ask. Use a medium‑fine grind (about 360‑660 µm) and fill the basket with roughly 20 g for a six‑cup pot, level it, and never tamp; heat near‑boiling water (93‑98 °C) in the lower chamber, then place the pot on a low‑to‑medium flame, lowering it once the coffee starts to trickle steadily. When the stream sputters, shut off the heat immediately, stir the brew to blend the layers, and pour slowly to keep sediment down—this gives you a bright, balanced cup, and the next step will show you how to fine‑tune flavor and consistency.
What a Perfect Moka‑Pot Brew Looks Like
What does the final coffee look like?
It stays dark, then turns a lighter amber, ending with a light bubbly top. The crema texture is fine, like a thin veil, and the aroma stays nutty and chocolatey.
Takeaway: Watch the flow, color, and crema; stop before sputtering, and you’ll get a clean, balanced cup. Next, ask yourself how fine your grind should be for this process. regular rinsing helps prevent coffee residue buildup and keeps the pot’s metal shiny.
The gasket seal ensures pressure is maintained for proper extraction.
Descaling removes mineral buildup that can affect pressure and flavor, so regular maintenance is essential. Iscale**
Choose the Right Grind and Fill the Basket Correctly
If you’re wondering why the grind feels like the secret sauce, you’re on the right track. The sweet spot is medium‑fine, about 360‑660 µm—think coarse salt, not flour. Burr grinders give you grind uniformity, which keeps the filter from clogging and lets pressure build smoothly. Tap the basket lightly after you level the grounds; don’t tamp them, because compression ruins basket sealing and can push coffee over the rim.
All right, how much coffee do you need? For a six‑cup pot, aim for roughly 20 g, a level tablespoon per cup. Distribute the grounds evenly, then press the lid just enough to seal without forcing excess coffee out.
Takeaway: Consistent, uniform grounds and a properly filled basket give you reliable extraction. Ready to heat the water to the ideal temperature?
A finer grind can increase extraction speed, especially on a high‑pressure Moka pot. The water‑to‑coffee ratio is crucial for balancing flavor and crema.
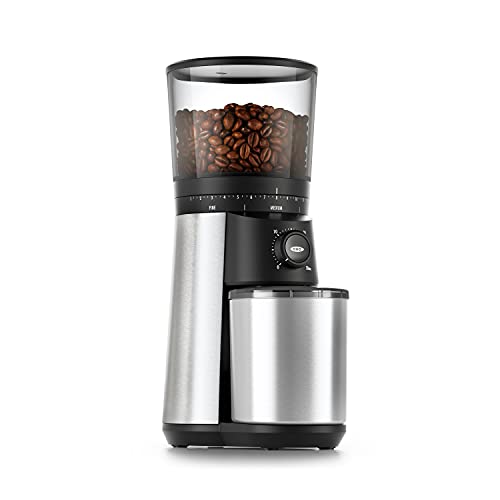
40mm stainless steel conical burrs: Precision grinding system produces uniform coffee grounds to ensure even extraction for rich, balanced flavor in every cup.

Supercharging Performance & Long-Lasting Battery – Equipped with a high-capacity 2000mAh battery that delivers 33% more runtime than the previous generation. The upgraded motor grinds coffee beans 1.8 times faster, ensuring rapid and efficient operation with every use

Slim, powerful grinder with precise settings from fine to coarse, with 15 settings and 29 micro-adjustments
Heat Water for Your Moka Pot to the Ideal Temperature
Because the water you pour into the lower chamber sets the stage for everything that follows, you’ll notice a big difference between a quick, clean brew and a bitter, over‑extracted one. You’re probably wondering how hot the water should be before you seal the pot. The sweet spot sits around 93 °C (200 °F) to just under boiling, about 98 °C (208 °F). Fill the chamber until the water reaches the safety valve but doesn’t spill over; this keeps pressure steady and protects the brew.
Now, heat the water in a kettle until it’s near‑boiling, then pour it in. Preheated water cuts brewing timing dramatically—your coffee will start bubbling within 45 seconds. If you use cold water, the pot takes longer to heat, and the grounds sit in a slower ramp, which can lead to over‑extraction and a metallic taste.
All right, watch the pressure valve. When you hear a steady hiss, remove the pot; that signals the ideal end of extraction. This quick stop preserves sweetness and avoids bitterness. Takeaway: Aim for near‑boiling water, fill just below the water valve, and monitor brewing timing for a balanced cup. Next, you’ll want to assemble the pot and set the right burner heat. Using room‑temperature water results in a slower extraction, which can increase bitterness. A typical Moka pot takes about 5 minutes from start‑up to the first gurgle, indicating the brew is nearly complete. For a smoother concentrate, consider a 1:4 coffee‑to‑water ratio when brewing cold brew to avoid over‑extraction. A consistent medium‑fine grind helps maintain even extraction and flavor balance.
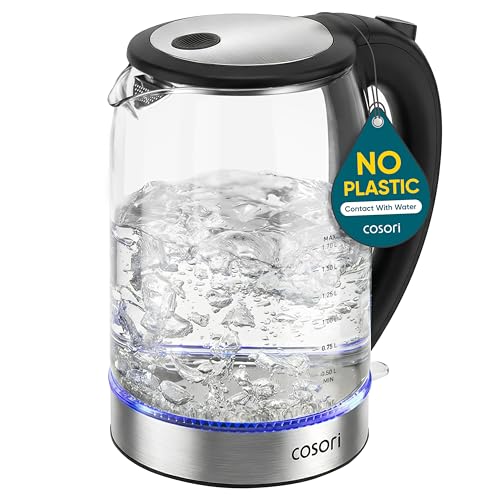
No Plastic Contact with Your Water——With no plastic inside, water never touches plastic, ensuring a pure taste and safer drinking experience

Fast Boiling: Experience rapid boiling with this 1500W electric kettle. Get hot water in just 3 minutes, perfect for making tea, coffee, and other hot beverages efficiently.

RAPID HEATING: Powerful 1500W heating element brings water to a boil quickly, saving you valuable time during busy hours.
Assemble the Pot and Find the Right Burner Heat
You’re probably wondering why the brew can go from smooth to bitter just by how you assemble and heat the moka pot. First, separate the lower chamber, **funnel, gasket, and upper chamber. Slip the funnel in so it seats centered, keeping the rim and threads free of grounds. Fill the funnel loosely with 15‑22 g of medium‑fine coffee, never tamp**. Brush stray grounds off the rim, then screw the top on firmly—no leverage, no overtightening. Use pot safety ergonomics: grip the handle, keep it away from the flame, and protect your hands with a towel or glove.
Now, match burner compatibility. On gas, set a flame smaller than the base; on induction, stay at low‑to‑medium heat. Moderate heat prevents scorching and keeps brewing time around 3‑6 minutes. Ensure the water level stays just below the safety valve to avoid over‑pressure. A smooth‑top electric stove may benefit from a heat‑diffusing pad to distribute heat evenly. Consistent pressure helps maintain extraction balance throughout the brew. Proper extraction timing ensures the coffee reaches optimal flavor without bitterness. Takeaway: Assemble cleanly, seal snugly, and choose a burner setting that respects the pot’s size. Ready to watch the coffee flow?
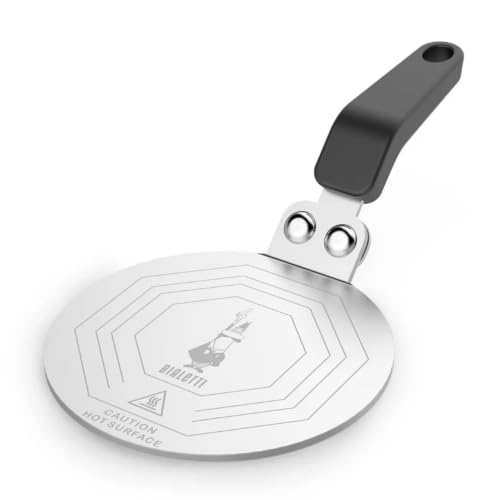
Function: a practical and versatile tool for the kitchen, suitable for the use of coffee makers and pots on induction hobs characterized by octagonal designs on its surface

Practical Tool for the Kitchen--The induction adapter can effectively protect our moka pot from the flames of gas stove. and good for the use of coffee makers, coffee pots on induction cooker.

Induction Stove Use: ESEVOLO stainless steel induction plate adapter is suitable for aluminum moka pots or all stovetop espresso maker that are not compatible with induction, or glass, ceramic small bowls. Having a heat diffuser cooking induction adapter, will allow you to heat the italian coffee maker on an induction cooktop! It can also be used on gas, glass and electric stove
Watch the Coffee Flow and Adjust Heat as It Starts
When does the coffee actually start to flow, and why does that matter? You’ll see a steady trickle from the spout about 60 seconds to 3 minutes after you light the burner. That moment signals the extraction phase has begun, so your brew heat timing becomes essential.
Now, watch the flow visual cues. As soon as the stream appears smooth and continuous, lower the flame to the lowest practical setting. This keeps pressure steady, avoids turbulence, and prevents bitter, scorched notes.
Here’s the thing: a gentle, controlled extraction yields better flavor. If the stream lightens or speeds up, keep adjusting heat downward. A small burner or briefly lifting the pot can help without stopping the flow.
Takeaway: Reduce heat the instant the coffee starts to pour, and stay responsive to visual changes. Next, ask yourself how you’ll recognize the sputtering cue that tells you to shut off the heat. Use filtered water to avoid mineral buildup and preserve flavor. Regular descaling prevents mineral deposits from clogging the pot and affecting taste. High‑pressure extraction creates a richer crema and a more intense flavor profile. A bottomless portafilter can be used to visualize channeling and fine‑tune your grind and tamp.
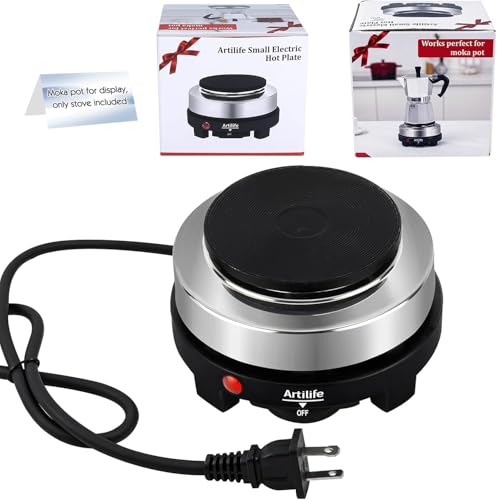
【USE MATTERS】1.Smell of plastic when you first use it,the very first time you turn it on,do it outside with a pot of water,and run at MAX heat level 5 for 15 mins outdoors to get rid of the smell. Plus if you let it run without water,the stainless steel part will be brown easily. 2 The burner transfers heat to the pot by heating itself,do not touch the stove body during use.3. When the electric stove is not in use,be sure to turn the switch to the "off" position and unplug the plug.
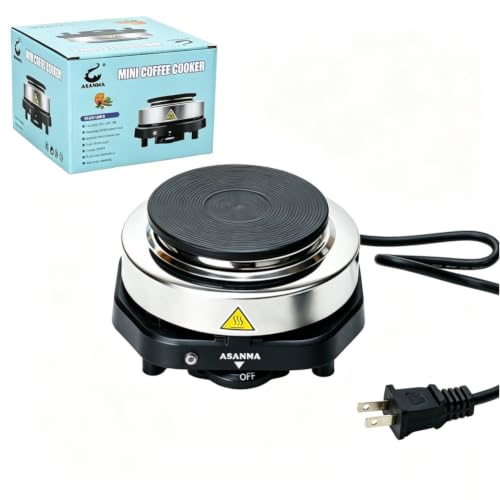
【Read Before First Use】When a new electric stove is produced, a layer of anti-rust protection film is added. This film will evaporate during the first use, thus causing smoke and unpleasant odors. For the first use, place it in a well-ventilated area and let it burn for 10-20 minutes to evaporate the protection film.
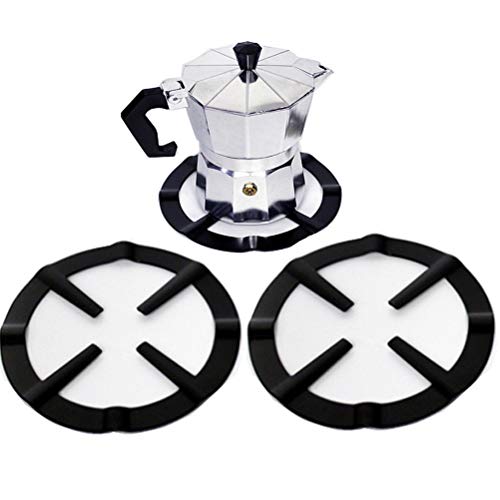
GREAT VALUE 2-PACK SET: Includes 2 heavy-duty cast iron stove trivet reducer rings. Specially designed to support smaller cookware like Moka pots, espresso makers, butter warmers, and Turkish coffee pots, preventing them from tipping over on gas range burners.
Spot the Sputtering Cue and Shut Off the Heat Immediately
How do I know the exact moment to turn off the heat? You hear the sputtering cue—first a gentle burble, then rapid, uneven spurts. That sound tells you the liquid phase is almost gone and steam is taking over.
All right, when the steady stream turns into intermittent sputters, you must act. Remove the pot from the burner or place the base under cold water for a rapid shutdown. This stops residual heat from pushing steam through the grounds, preventing bitterness.
Here’s the thing: a high flame can cause early sputtering, so match burner size to the pot base. If the sputter appears too early, lower the heat now.
Takeaway: Spot the sputtering cue and execute a rapid shutdown to preserve a smooth, non‑bitter brew. Next, ask yourself how to fine‑tune flavor and consistency. You should also check the rubber gasket for dryness or damage before brewing. Regularly cleaning the group head prevents residue buildup that can affect heat distribution. Consistent tamping pressure ensures even extraction and balanced flavor. The pressure differential between the boiler and the brew chamber is key to achieving proper extraction.
Fine‑Tune Flavor and Consistency in Your Moka‑Pot Brew
Spotting the sputtering cue is just the start; now you wonder how to dial in flavor and consistency.
How do I set the water level for the right brew pressure?
Fill the boiler just below the safety valve—about 140 g for a light roast, 120 g for a dark roast in a three‑cup pot. This level keeps pressure steady and lets you trace flavor changes to a single variable.
What grind consistency should I aim for?
Use a medium‑fine grind, roughly 360–660 µm, like sand just finer than table salt. Burr grinders give uniform particles; uneven bits cause both under- and over‑extraction, ruining balance.
Which water temperature works best?
Start with near‑boiling water (≈95 °C) in the lower chamber. It shortens extraction time and prevents overheating, while a medium‑low heat setting maintains a gentle flow.
Takeaway: Adjust water level, grind consistency, and water temperature together to control brew pressure and achieve a repeatable, balanced cup. Next, ask yourself how you’ll finish and serve that perfect brew.
Use an airtight container for storing any pre‑ground coffee to preserve freshness.Espresso‑style pressure can be approximated in a French press by using an extra‑fine grind and a higher coffee‑to‑water ratio.
A fine grind will also reduce the risk of channeling and improve extraction consistency.
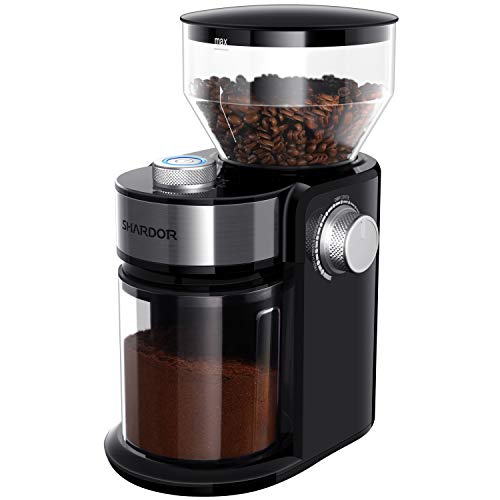
[ UNIFORM BURR GRINDING ] Premium metallic flat burr mill ensures consistent, uniform grounds without burning beans. Perfectly preserves rich coffee aroma for pour-over, drip, and cold brew.

40 EXTERNAL ADJUSTABLE GRIND SETTINGS - Unlike traditional grinders with internal adjustments, our manual coffee grinder offers 40 precise external settings. The easy-to-use adjustment ring lets you select your perfect grind level, broadening your coffee flavor options without the mess of stray grounds. Perfect for espresso, pour-over, French press, and more.

[Consistent Flavor Extraction]: Choose the coarseness you need from the 28 settings on the Lonkion burr coffee grinder. The flat metal burr grinding head ensures an even and consistent grind. Whether you need a fine grind for espresso or a coarser grind for French press coffee, you can adjust the grind size for any coffee type.
Stir, Serve, and Enjoy Your Moka‑Pot Coffee
Why should you stir right after the Moka‑pot finishes? You’ve just brewed a layered brew; the first‑extracted coffee sits denser on top, leaving lighter liquid below. A quick stirring technique—using a teaspoon—mixes those layers so every sip tastes the same, especially when you split the pot into several cups.
Now, pour carefully. Slow, steady pouring keeps fine sediment in the bottom, giving you a cleaner cup. If you pour too fast, you’ll stir up grit and ruin the smooth texture you love.
All right, enjoy it immediately. Heat left in the pot continues extraction, turning the flavor bitter. Immediate serving preserves the bright aroma and balanced taste.
Takeaway: Stir, pour slowly, and drink right away for the best moka‑pot experience. What will you pair with your fresh cup?