
You’re probably wondering how the carafe, plunger, rod, and filter mesh all fit together, and you asked the right question. First, pull the plunger up, lift the lid, and slide the rod out; then unscrew the bottom connector and separate the cross plate, mesh screen, spiral plate, and retaining disk. Stack them back in that exact order, tighten the connector, re‑insert the rod, and finally drop the filter assembly into the carafe—now you’re ready for a smooth press and a great cup.
French Press Assembly: Identify All Parts and Their Functions
What parts make up a French press and what do they do? You’re probably wondering which piece matters most, and why. The carafe—whether glass, stainless steel, or plastic—holds the grounds and hot water, acting as the steeping vessel. Its material influences heat retention and durability, so pick one that fits your routine. The base stabilizes the whole system, keeping the carafe upright while you press.
Here’s the thing: the plunger’s ergonomics matter. The handle offers a comfortable grip, and the rod connects it to the filter mesh, which separates coffee from grounds. A well‑designed plunger prevents leaks and makes the downward motion smooth.
Takeaway: Knowing each component’s role—carafe material for temperature, plunger ergonomics for control—helps you assemble confidently. Next, you’ll learn how to disassemble safely.
Regular maintenance, such as using mild soap after each brew, prevents residue buildup and maintains flavor.
A proper 1:15 ratio ensures optimal extraction during brewing.
Consistent water temperature is crucial for balanced flavor extraction.

GROUNDSCONTROL FILTER: After plunging, the GroundsControl Filter separates grounds from your brew and stops the brewing process to lock in a balanced flavor in every cup.
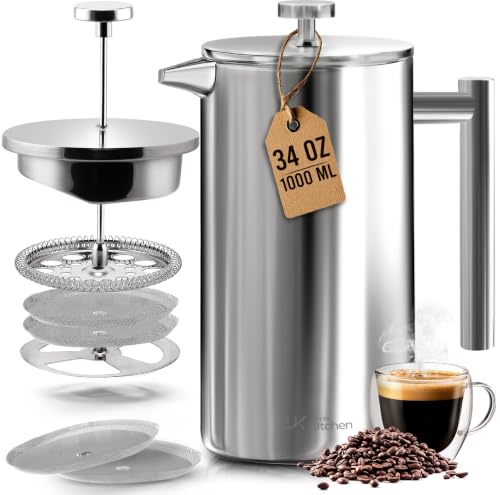
Double-Walled French Press: Make perfectly brewed coffee at home like a barista. The double-walled coffee press is heat resistant. Its solid construction will keep the drink hot for a long time.
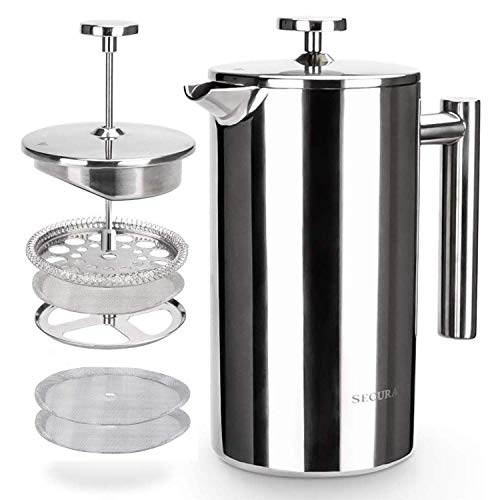
Secura stainless steel French Press coffee maker is made from top quality 18/8, 304 stainless steel, both the interior and exterior. It is made to outlast other coffee makers
French Press Assembly: Disassemble the Press Safely
You’re probably wondering how to take the press apart without cracking the glass or bending the metal. First, make sure the press is fully depressurized; keep the plunger up and lift it gently to release any remaining pressure. This material‑pressure safety step prevents sudden bursts that could shatter the beaker.
Now, remove the lid and pull the plunger assembly straight out. If grounds resist, twist slowly instead of yanking. For removable beakers, lift the glass out of its frame and set it on a soft towel. Keep the assembly aligned to avoid stress on the rod and filter stack.
All right, unscrew the filter stack in order. Hold the rod firmly, turn the bottom connector counter‑clockwise, then separate the spiral plate, mesh screen, and retaining plate one by one. Use component labeling to keep each piece grouped; this saves time later and prevents loss.
Finally, organize everything on a clean cloth: lid, rod, disks, mesh screen. Lay parts flat, inspect for wear, and maintain the original order. The takeaway: follow these careful, labeled steps and you’ll disassemble safely, ready for the next phase. Avoid frequent disassembly to prevent thread failure over time. Proper brew ratio ensures consistent extraction across different coffee methods. A proper coarse grind will also help prevent grounds from slipping into the filter during disassembly. Adding optimal water temperature during brewing helps achieve the best flavor balance.
French Press Assembly: Clean Every Piece Before Re‑assembly
If you’re wondering why cleaning each piece matters before putting your French press back together, the answer is simple: leftover grounds and soap can ruin the next brew and even cause mold.
How do you start the clean‑up?
Run hot water through the carafe, swirling to dislodge oils and grounds. Do a quick Carafe inspection—look for film or tiny particles. If stains appear, add a few drops of mild dish soap, rinse thoroughly, then set the carafe aside to dry completely.
What about the filter stack?
Separate the mesh, cross plate, spring disk, and retaining disk. Rinse each under hot water, using a soft brush for stubborn residue. Avoid harsh scrubbers; they compromise mesh durability and can warp the filter. Rinse until no soap remains.
How should you finish?
Rinse the plunger rod, lid, and spout, wipe with a lint‑free cloth, and air‑dry everything on a clean towel. Make sure every piece is bone‑dry before re‑assembly to prevent mold.
Takeaway: A thorough, gentle clean protects flavor and longevity. Ready to put the parts back together? The French press’s coarse grind maximizes extraction while minimizing sediment.
water temperature consistency optimal extraction temperature] a crucial factor for balanced flavor.
A proper coffee‑to‑water ratio ensures the brew is neither too weak nor over‑extracted.

Made of non-scratch and odorless nylon bristles. Firm grey bristles on the tip are able to clean off the stubborn stains on the bottom and hard to reach areas, while the black bristles clean the body effectively.
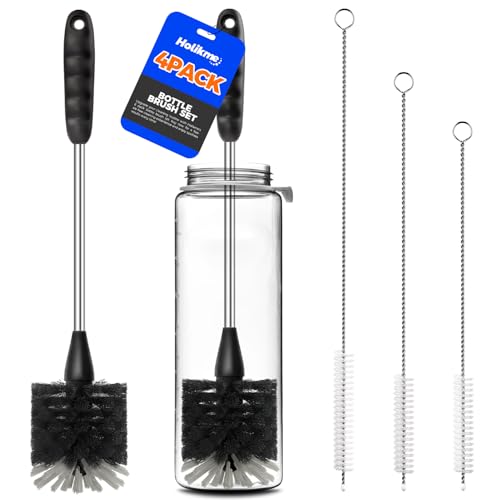
【4 PACK BOTTLE BRUSH SET】Includes 14" bottle brushes with stainless handle, 3×straw brushes. With this complete set of cleaning tools, you'll have everything you need to keep your drinkware sparkling clean and ready to use.

Specially Designed for Chemex: You will receive 1 coffee maker brush, engineered to perfectly clean pour-over coffeemakers by reaching all contours of the signature glass carafe for thorough stain removal. Please note that our product isn't sponsored or endorsed by the brand it fits, including Chemex.
French Press Assembly: Re‑assemble the Filter Stack in Correct Order
When you’re unsure which piece goes where, the confusion ends once you see the stack from the bottom up: cross plate, mesh filter, then spiral plate.
Why does order matter?
The filter material needs a solid base; the cross plate holds it centered, preventing gaps that let grounds slip through. Placing the mesh screen on the cross plate first guarantees even support, then the spiral plate sits snugly on top, preserving seal integrity.
How to re‑assemble?
First, set the mesh filter onto the cross plate, making sure it lies flat. Next, add the spiral plate directly on the mesh screen, aligning edges precisely. Finally, tighten the bottom connector so the whole unit slides smoothly.
Takeaway:
Correct stacking keeps the filter centered, maintains seal integrity, and ensures a clean brew. Next, you’ll attach the plunger rod securely.
The bottom filter is the first level of filtration, so it must be installed before the top micro‑filter. Bottom filter ensures proper coffee extraction.
Proper water temperature is crucial for optimal extraction in a French press.Full‑immersion brewing extracts flavor more efficiently than traditional steeping.
Regular descaling prevents mineral buildup that can affect the press’s sealing components.

Long-Lasting Durability: Made of premium 304 stainless steel fine mesh, rust-resistant and corrosion-resistant for long-term reuse.

【Wide Compatibility】Our replacement filter screen is designed to fit most 8-Cup (34 Oz/1000ml) French presses. For ideal compatibility, measure your existing filter—it should be 4 inches (100mm) in diameter.
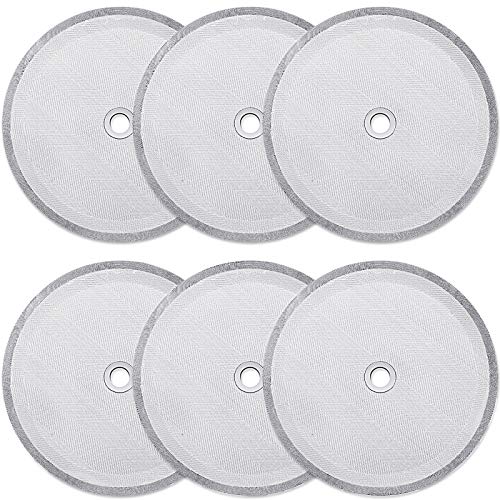
What you get: you will receive 6 pieces of french press filters in total, sufficient quantity to meet your daily filter replacements, you can share with your good friends, practical in your daily life
French Press Assembly: Re‑attach the Plunger Rod Securely
How do I make certain the plunger rod stays put? You’ve probably worried about wobble or a loose plunge, so let’s nail it down. First, locate the rod’s threads in the center of the cross plate. Hand‑turn it clockwise, feeling for smooth resistance—this guarantees proper thread alignment and avoids cross‑threading. Once the threads engage, give it four to five full turns, then stop.
Now, apply the right materialunger torque. Aim for about 12–15 inch‑pounds; you’ll feel a snug, stable click without strain. Over‑tightening can strip the metal, while under‑tightening lets the rod loosen during brewing.
All right, test the alignment. A quick dry plunge should glide straight, with no tilt or wobble. If it feels firm and centered, you’ve secured the plunger.
Takeaway: Hand‑start the thread, twist to 12–15 in‑lb torque, and verify a smooth, centered plunge. Next, you’ll want to fit the filter assembly perfectly in the carafe. Rotate rod into base approximately four to five turns.
Maintaining the proper coffee‑to‑water ratio ensures consistent extraction and flavor. A short steep of four minutes can keep the brew bright and less bitter. The extraction method of a French press yields a richer, fuller-bodied cup compared to espresso.
French Press Assembly: Fit the Filter Assembly Perfectly in the Carafe
You’re probably wondering why the filter sometimes leaks coffee grounds, and that’s a solid question.
You measure the carafe’s inner diameter, then add about ¼ inch to pick the right filter size. A 2.5‑inch interior pairs with a 2.75‑inch screen, giving a snug edge that blocks bypass.
Here’s the thing: the cross plate holds the mesh screen, and the spiral plate sits on top. Stack them in that order, then lower the assembly into the opening without forcing or tilting. The mesh density should match the filter size so the screen sits evenly against the wall.
All right, make sure the stack rests flat on the base; any gap lets grounds slip past. Tighten the plunger connection just enough to hold everything steady.
Takeaway: a correctly sized, well‑aligned filter assembly seals the carafe, prevents sediment escape, and sets you up for a clean brew. Next, you’ll want to verify smooth plunger movement.
The filter should be checked for wear before reassembly.
A proper coarse grind reduces over‑extraction and helps maintain a smooth, low‑acid flavor.
The paper filter in a Chemex removes more oils, resulting in a brighter cup compared to the French Press.
Full immersion brewing retains more coffee oils, giving a richer body than drip methods.
French Press Assembly: Verify Smooth Plunger Movement and Adjust
If the plunger feels gritty or sticks halfway down, you’re probably dealing with a misaligned filter or a clog. Dry‑plunge the press; you should feel light, steady resistance, not a jerky grind. Check plunger torque: a gentle twist should let the rod glide without forcing it, confirming seal integrity isn’t compromised.
All right, what causes stiffness? Fine grounds, coffee oils, or a bent mesh can jam the filter, while leftover soap adds drag. Rotate the plunger slightly left‑right as you push, or lift a bit and retry to release suction. Tap the carafe sides to dislodge compacted particles, and let the press cool a few seconds before the final plunge.
Now, reassemble with care. Align the mesh flat and centered, keep the cap and rod straight, and tighten just enough to maintain seal integrity without overtightening. A quick water test after reassembly verifies smooth travel.
Takeaway: smooth plunger movement hinges on proper torque, clean filter, and correct alignment. Next, you’ll brew your first cup—grounds, water, timing. The metal filter allows a bit of grounds to pass, giving a richer mouthfeel.
A well‑folded Chemex filter can prevent channeling and improve overall brew clarity. Understanding ex pressure differences helps you choose the right method for your taste.
French Press Assembly: Brew Your First Cup – Grounds, Water, Timing
When you wonder why your French press sometimes tastes weak or bitter, the answer lies in three simple choices: how much coffee you use, how hot the water is, and how long you let it steep.
What brew ratio should I start with?
Use roughly 7 g of coffee per 4 oz of water—about 30 g for 350 g water works well. A consistent brew ratio gives you control over body and strength.
How do I manage temperature control?
Heat filtered water to 205‑210 °F, just off the boil, and pre‑heat the carafe. Hot water starts extraction instantly, so pour, then start timing.
What timing steps matter?
Bloom for 30 seconds with a splash of water, stir gently, then add the rest. Let it steep 4 minutes before pressing slowly.
Takeaway: precise ratio, steady heat, and timed bloom deliver a balanced cup. Ready to press?

【Ultra Small, Yet Professional】The Espresso Scale is small enough to fit in your palm. It measures 4.13*4.13*0.78 inches and weighs just 0.75 pounds. The coffee scale can work on most espresso machines and small pour-over coffee stands. It's easy to store and carry around, making it perfect for coffee lovers who like outdoor coffee.

【3 Smart Modes, 0.1g Pro Precision】Unlock precise control with 0.1g accuracy and 3 smart modes: Auto Timer for Pour-Over, Auto Timer for Espresso, and Standard Weighing. Whether brewing espresso or pour-over, this coffee scale adapts to your style for consistent, accurate results. The larger, easy-to-read display and quick response time help you focus on pouring technique and flow rates without distractions
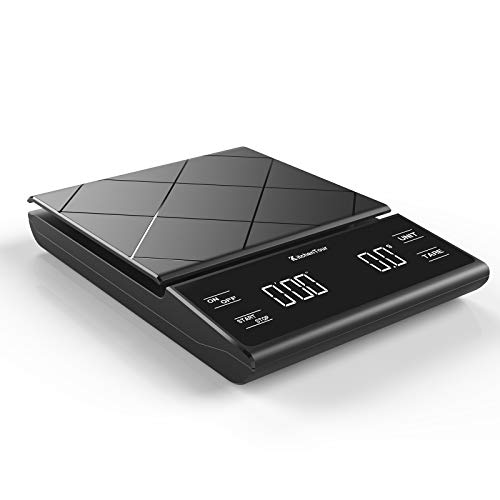
#Make Coffee Better every time# - KitchenTour EK6012 defines the latest in precision weighing technology with a weight capacity from 0.3g - 3000g to help you measure and get an exceptional cup of coffee with refined accuracy. The electronic coffee scale has a built-in timer to cook and time your coffee to ensure the consistency of each cup of coffee.
French Press Assembly: Troubleshoot and Maintain the Filter Stack
Even though the filter stack feels like a simple plug‑in, a mis‑aligned mesh or loose nut can turn a smooth press into a stubborn grind. You’re probably wondering why the plunger sticks or why grounds leak around the sides. The answer lies in fit, alignment, and seal integrity.
How do I check the stack for proper fit?
Now, hold the mesh against the carafe bottom; it should sit flat, centered, and match the inner diameter within a quarter‑inch. Rotate the plunger gently if it catches—this recent‑centers the layers. A snug, not overtight, nut keeps the stack tight without warping the screens.
What cleaning routine protects filter lifespan?
Here’s the thing: rinse each screen in warm, soapy water after every brew, brush gently, and dry thoroughly. Weekly deep cleaning removes coffee oils that clog fine mesh, extending filter lifespan and preserving seal integrity.
When should I replace the stack?
Obviously, if resistance spikes, sediment appears, or screens warp, inspection shows wear. Replace with a correctly sized filter to restore smooth pressure and maintain seal integrity.
Takeaway: Keep the stack flat, clean it regularly, and replace worn parts promptly. Next, test your brew and notice the difference.

Universal 4 Inch Replacement Screens: 4 Pack featuring 100 Mesh ultra fine filter mesh and sturdy metal center ring. The stainless steel filter fits most 8 cup 34oz french coffee makers and blocks fine grounds for sediment-free coffee
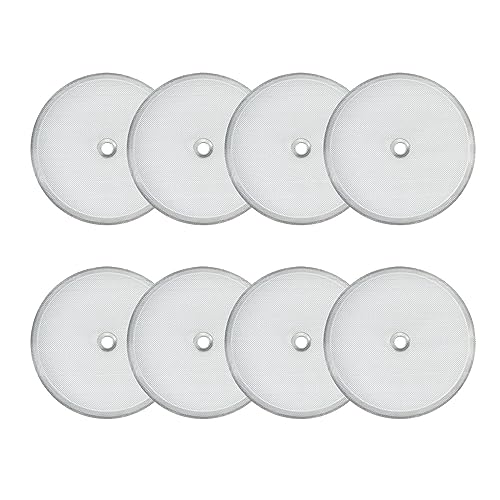
【High Quality Filtration】Pieces French Press Replacement Filters use a higher density filter screen to filter 99% of Used coffee grounds, and you can enjoy smooth and rich coffee,tea.

FRENCH PRESS FILTER-You will receive 3 pack of stainless steel french press coffee mesh filters in total.